STORYLINE ENTRIES
A1. As you slip between the legs of the man whose anguished screams now fill your ear, you notice your torch has been nearly extinguished from the fray. No matter: that’s probably a good thing, since being visible merely makes you a target. You crawl hastily on all fours to the side until you bump up against a stone wall covered in cold mold. The shouts of your fellow captives grow more and more distant, and before long you can no longer see the light of their torches. In the dim and muted light of your own torch, you begin to take stock of your surroundings. The ground is black and rough, like dried up magma. But the walls are made of carefully cut stone blocks that rise up on either side to a low ceiling. The ceiling is covered with wooden planks that reach from one wall to the other, keeping at bay the filling of the pyramid above. With a sharp intake of breath, you notice that skeletal hands and legs stick out of the ceiling every ten feet or so—this must be the remains of the earliest sacrificial victims whose corpses were tossed into the lowest foundation pits of the Sun Pyramid many eons ago. If all had gone as planned yesterday, your skeleton would have suffered a similar fate in the interior of the Moon Pyramid. This is a morbid place. But there is no going back—only forward. You can now move up to four squares on the map for Level 1, rolling 1d6 each time you do so to determine whether or not you encounter a random enemy. If you reach a square marked by a letter and a number, however, you do not need to roll the die for a random enemy encounter on that turn. Instead, you will turn to the STORYLINE entry for that square.
A2. After trudging through the drained cistern, you enter a pitch-dark chamber filled with the broken shards of Storm God ceramic vessels that your torch did not reveal. DEDUCT -5 VITALITY.
A3. You press down on three humanoid head glyphs on the wall and brace yourself for something to happen. After a few seconds, you start to feel the ground shake and hear the solid clunking of what sounds like a tower of bricks collapsing. The commotion appears to be coming at a diagonal angle from the other side of the wall. You gain the codeword “Toltec.”
A4. As you approach the end of a curling corridor, a mysterious gust of wind snuffs out your torch and a swirl of reddish lights engulfs you. The lights then coalesce into a sight for sore eyes: your great-grandfather, who was murdered in the Teotihuacano sack of your village. Reduced to tears and wonder, you can only watch dumbly as the vision begins to speak to you somewhere in the recesses of your mind. “Do you know why our people were forsaken? We used to worship the Old Fire God, but he got old and inform, so we lost faith in his powers. The High Priest of the Teotihuacan Plateau promised to return Huehueteotl to his former spiritual glory—and in exchange, the Old Fire God caused the volcano to erupt in violence and bury the world in ash and fire. To show his gratitude, the High Priest elevated Huehueteotl to the premier deity of Teotihuacan, overseeing the glorious construction of the new city on top of the buined layers of the old. But then the Sun Pyramid was completed, and the Teotihuacanos turned their attention to other gods as well—making the Old Fire God doubly spurned, and doubly bitter of the burden he bears. That’s why they have to feed him sacrificial victims constantly, otherwise the volcano will erupt again. You are the last of our clan. You must survive the cruelty and cunning of the High Priest and his cronies!”
A5. You approach the familiar sight of an Olmec head blocking the entire corridor. Its eyes flash open but instead of speaking out loud, three images come into your head: they are the same ones that hung above the other three Olmec heads you encountered on this floor. The head demands to know the grid square location of the image which depicted a series of dots that resembled a bison. Take that location, convert the letter into a number based on its position in the alphabet, then convert the number into the letter that appears at that location in the alphabet. Turn to that STORYLINE entry now. If you cannot figure out the correct answer, the Olmec head stares at you with an impassive face and shows no signs of letting you through this corridor.
A6. Before you even round the bend of this short walled corridor, you sense a palpable whiff of fear in the air. It doesn’t take long to determine the source. Standing in the corner is a Jawbone Necklace Warrior with his muscled arm locked around the throat of a female captive. It is apparent on a mere glance at her oblong head that she is a member of the Mantika clan—just like Pitlac! As you inch forward, the warrior mirrors your every step, with one hand free to engage in battle while the other keeps his captive hostage. You must fight JAWBONE NECKLACE WARRIOR WITH CAPTIVE (40 VITALITY, 9 AGILITY, 2d6+5 DAMAGE). If you want to try and spare the life of the Mantika hostage, you will only inflict half of the offensive damage levied on your opponent via the kendama. This extra strain and effort will ensure that you do not carelessly slice her to pieces during the battle. If you do not care whether she lives or dies, then you may inflict the standard amount of offensive damage in your attacks and she will die with the Jawbone Necklace Warrior. If you win, turn to P4.
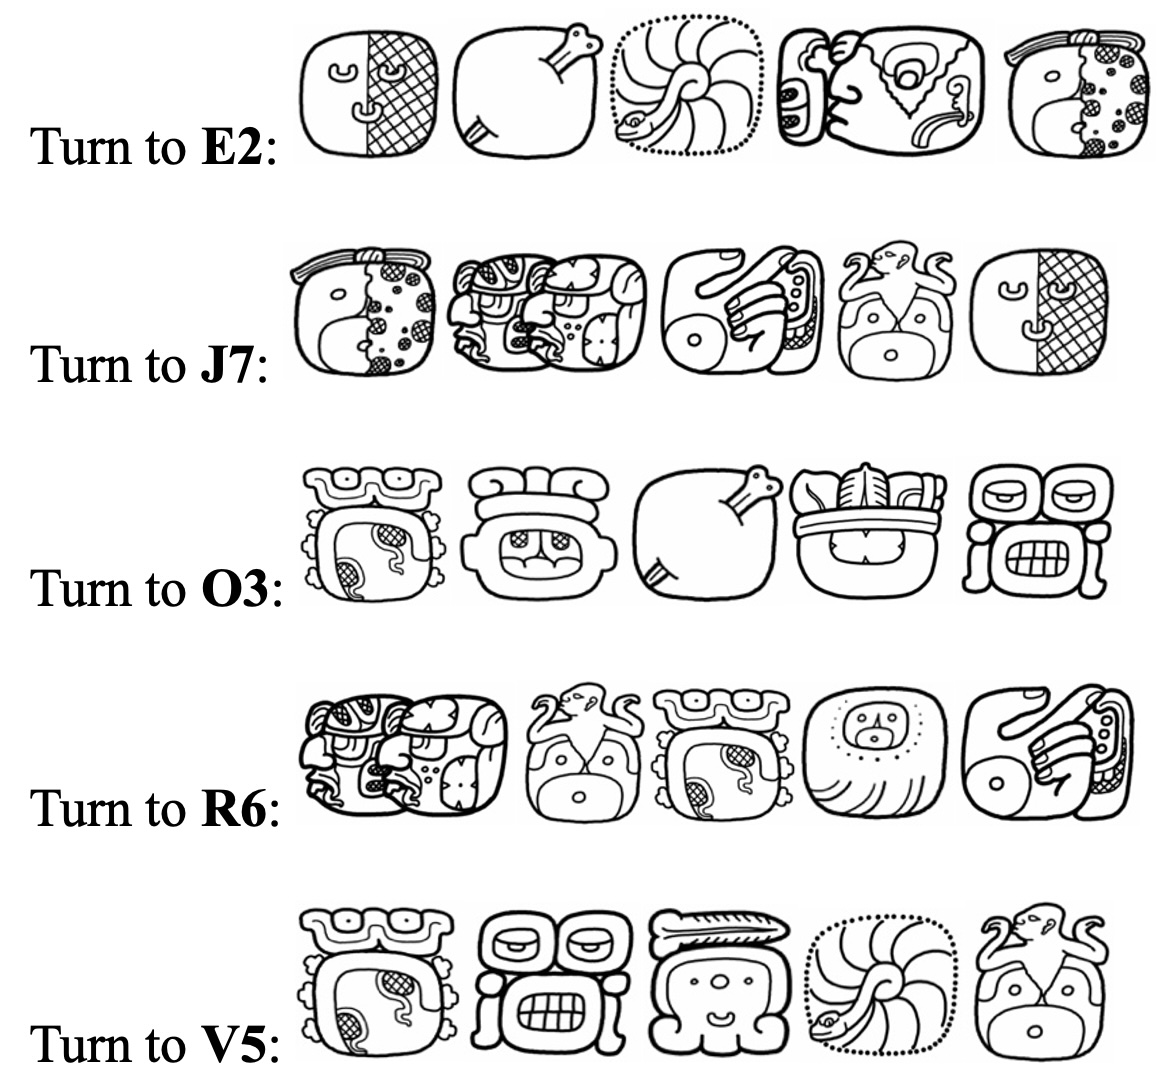
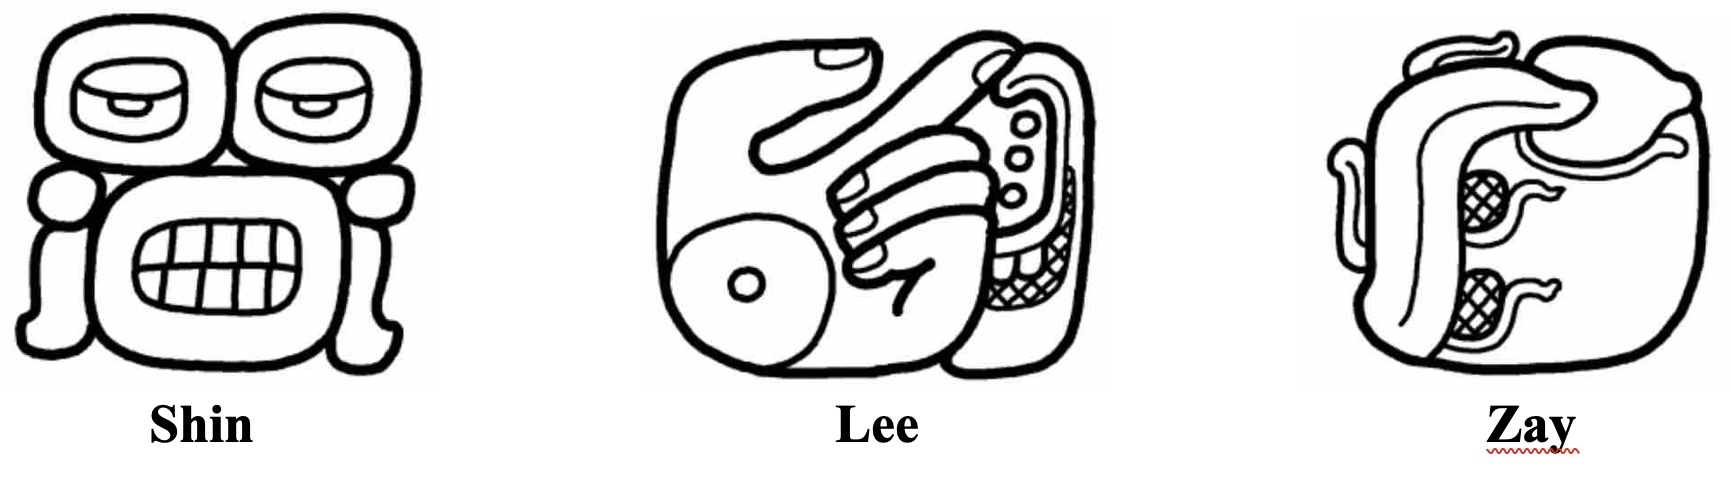
A7. Fused onto the rock surface of the wall are three symbols composed of precious stone mosaics. Since they are raised slightly from the rock surface on which they are mounted, you touch one of them gently and are startled to see the precious stones light up. It is accompanied by an echo of a ghostly, monotone voice: “Forn!” The sound reverberates throughout the chamber, though the word means nothing to you. You then proceed to touch the other two mosaic symbols and different nonsensical sounds bellow out of the darkness. It might be a good idea to study these three symbols and their associated pronunciations carefully:
A8. You fix the last of the greenstone tablets into the remaining hollow depression in the wall and wait for something to happen. And happen it does! All six tiles light up in unison and the stone wall begins to pull apart from some previously invisible crevice in the center. The rumbling of the stone walls shakes the ground beneath your feet and must also extend downward along the walls beneath the grill under your feet, for it is echoed by a loud hissing sound from the abyss below. You shudder to think what your fate may have been if you inserted the tiles in the incorrect order and the grill opened up beneath you. You may now pass beyond M1 and into the serpentine portion of the map for this level.
A9. You approach the center of the Sun Pyramid where two diagonal walls close in to meet one another at a massive stone pillar. Etched in the rock high up on that stone pillar is the following image:

Based on both the location and intricacy of this sign, it might be a good idea to try and remember something about it.
B2. You find a small alcove in which a dark tunnel seems to reach back through the rock wall at the rear end. You try to get closer to see where it goes, but a fierce gust of nonstop wind pushes you out of the tunnel and prevents you from inching any closer. You wait a few minutes to see if the windblast will die down, but it appears to be constant. You shrug your shoulders and move along.
B3. You emerge from the spiral staircase leading up from the cave below and indulge in a guilty smile at the natural sunlight that has infiltrated various corners of this floor. You can’t be that far away now from getting back to the world above. But first things first. This is a floor unlike any other you have yet seen. Immediately behind you, lapping up to the stone porch on which you stand, is a vast reservoir of water that appears to be quite deep. Having never learned to swim, you cannot think of any other way across. On the other side of you is a long and narrow corridor that branches off in opposite directions. At the intersection of the two, just a short walk away from your current position, is a massive stone head. Unable to think of any way to deal with the vast pool of water blocking your way forward in the other direction, you approach the large stone head instead.
B4. As you pass around the outside of the stone altar, you find a brightly lit alcove with a floating sphere of flames circling around an inner translucent orb. You can hear the faint crackling of sparks or some sort of energy emanating from its circumference. You touch it with your torch to rekindle its flame and the encircling flames reach out to light its strands of straw like a welcoming hand. A thought comes into your mind: you are standing within the lower bowels of the Sun Pyramid, which was built for the Old Fire God, who governs the intensity of the sun during the dry season. It is probably no coincidence that a floating orb of fire can be found here. If you would like to reach your hand into the suspended ball of flames and touch the translucent orb inside, turn to K5. If not, you may exit this alcove and continue on your way.
B6. As you round the second bend in this twisty corridor, with rattlesnakes writhing around on the ground just below the raised pavement, you gain a clear view of the High Priest at the base of the Pyramid of the Feathered Serpent. He is now flanked by a line of naked sacrificial victims, whom he ties roughly to an altar for the final vivisection. You seeth in anger at the sight of a still throbbing heart lifted into the air in the direction of the Quetzalcoatl’s Roost—the top of the pyramid. The sacrificial rite to Quetzalcoatl is now in its advanced stages and you must hurry to ensure that the Feathered Serpent is not conjured into this world.
B7. You draw a crude outline of a puma to the left of the tail with six dots, taking care to connect the tail with its rear end. Then you wait. Without warning, the wall with the enigmatic painting bursts open with a great shattering and mighty snarl. When the dust settles, you find yourself confronted with the flesh-and-blood embodiment of a large and sleek puma who sports razor-sharp claws. It is even larger and more aggressive than the Escaped Puma you encountered on the first floor. Since the puma appears none too happy to see you here, it seems likely that you drew the wrong beast. Nevertheless, you now have no choice but to fight SLEEK PUMA (20 VITALITY, 8 AGILITY, 2d6 DAMAGE). If you defeat this beast, you step over its steaming carcass, gingerly avoid its sharp claws, and pass through the hole in the wall created by its dramatic appearance.
B9. At the end of a long side corridor, you find an altar with a circular stone mirror inlaid with a jaguar mosaic. The workmanship is exquisite, increasing your admiration for the Olmec people whom your own clan once extinguished. The mirror sits loosely on the altar and you may take this JAGUAR MIRROR MOSAIC if you wish. If you do, you may use it to conjure up a JUGULUAR JAGUAR (20 VITALITY, 10 AGILITY, 3d6+3 DAMAGE) during combat. The Jugular Jaguar will continue to fight on your behalf whenever you call upon it and will absorb all enemy damage until it is killed. There is no way to help it recover lost vitality points.
C1. In the middle of a high wall faced with large stone bricks, one rectangular section has been framed on the original rock surface with a crude depiction of two stags with antlers:

Considering the care that was taken to frame this painting on the original surface of the underlying rock wall, you should probably study it carefully and make some notes, as you will not be permitted to consult this entry again later unless you walk all the way back to this site.
C2. You crawl through the round opening the wall and tumble head over heels into a vertical shaft lit by natural light from above. Much to your surprise, the shaft goes up rather than down and is faced with stone bricks. Not only that, but the path itself is composed of a spiral staircase of stone steps hewn directly from the rock. You take a moment to compose your mind and body and then begin to ascend the staircase. For better or for worse, it appears you are returning to a living civilization and leaving the dead behind. You may now turn to B3 on the map for Level 4: Cistern of the Storm God.
C4. You shout in exultation as you witness the death throes of Tlaloc. Once the fatal blow struck home, Tlaloc’s face was a sight for sore eyes: fear, shock, and rage all intermingled into one comical grimace. First his maize staff shattered without warning, and then Tlaloc himself burst apart in a cascade of popped kernels of corn. Desperate for natural light, you rushed ahead and climbed up a spiral staircase ornately decorated with sculptured faces resembling crocodiles and some sort of feathered serpent. Disturbingly, you notice that the chiseled out teeth and fangs of the head sculptures actually drip drool. If you would like to throw caution to the winds and lick this drool off the sculptures, turn now to M8. When you finally emerge above ground, the bright light of the unobstructed sun is almost too much to bear. As you squint your eyes and shield your face with your arm, the discover that all is silent—nothing like the cacophony of noise and bustle that you expected. You study your surroundings. Straight ahead are narrow walled corridors at least twenty feet high, each of which branches off into a different direction, the end of which you cannot see. Behind you the wall is much lower, allowing you a glimpse at what lies outside these walls: endless trenches filled with rattlesnakes. But it is the view to your left that appears of greatest import: at the base of the Pyramid of the Feathered Serpent stands none other than the High Priest himself, bedecked in an elaborate feather headdress and hanging accessories dangling with precious stones of all sorts. Most disconcertingly of all, he is staring directly at you. “Now is the time to call upon Quetzalcoatl to protect the City of the Gods from its enemies! Defenders of the new gods, take up your positions Do not let the intruder pass!” From concealed tunnels underneath the pavement you see various warriors and other frightening figures emerge from below and dash across the courtyard to the end of the high-walled corridors. The path that leads to the High Priest appears to be blocked by a solid stone gate gate with six hollow cavities impressed upon its surface. It appears as though the keys to opening that gate lie in the corridors in front of you and will likely involve locking horns with the figures you just saw disappear into them. Before you proceed any further, note that there are no random enemies on this level; instead, each time you move you must roll 1d6 and receive one of the following:
- nothing
- conch shell
- jawbone
- flayed skin of a deadly enemy
- rattlesnake bite (DEDUCT 1d6+3 VITALITY PTS.)
- trip and stumble (DEDUCT -1d6 VITALITY PTS.)
C6. With a satisfying “thwap” sound, the taut rope snaps in two and the upper end disappears into the dark recesses of the ceiling. Almost immediately, you hear the clumsy clunk of two things colliding, then the rusty groan of something lifting up and creaking. All these sounds are washed away by the sweet sound of splashing water like coastal waves. The central cistern beyond the grid square marked B3 has now been drained of enough water that you can walk past that point and enter either of the two side corridors that lead to F5 or V1. You will not encounter any random enemies while walking through the drained-out portion of the cistern.
C7. In the corner of a long passageway, you find yet another large stone Olmec head staring impassively back at you. Above its head on the wall are a series of red dots deliberately arranged in some design. As you squint your eyes and try to study the dots from a distance, the head suddenly opens its mouth: “Look carefully.” Then it shuts it mouth again and reverts to an ornately chiseled block of rock. You may make notes describing what you see, but you may not copy it exactly. If the Olmec head sees you doing so, it will suck you toward its mouth and smash your body into its nose, resulting in a LOSS OF -10 VITALITY. So don’t do it!

C8. The surreal images of fantastic charging beasts vanishes from your mind and the bare stone surfaces of the Water Goddess turn a dark maroon and green. “You are an observant child, my dear,” the voice in your head continues, “and so I will give you a chance to prove your worth against the Old Fire God. Your skin will not melt away in roasted strips like it does for the unobservant.” You gain the codeword “Tikal.” Your mind then fills with vivid images of a different sort. You see monstrous stags with majestic interlocking antlers rising ten feet out of their skulls grazing on a grassy savannah. Long ponderous beasts, with leathery silver skin and a single horn protruding out of their noses, lie in marshy fens. Hidden in the brush are men and women who look like you, waiting to pounce with their spears. And then, a violent rumbling of the ground, a spectacular plume of grey smoke, and an endless rain of ash and fire cover the surface of the land. The great stag kneels to its death, the horned beast groans and rolls over, drowning in the swamp. And then everything is enveloped by a red-hot wave of molten rock, burying the world and its strange creatures in a suffocating sleep for the ages. Before long, green stalks grow out of the black rock, lesser animals search for prey, and another hairless monkey appears from beyond and builds homes of mud and thatch. You understand now: beneath this hardened black rock on which your feet have trod lies the ruins of a vanished world.
D2. Sitting silently in the center of the chamber, hemmed in on three sides by fallen boulders, is a man sitting down on the ground with crossed legs. He wears a distinctive T-shaped headdress, but otherwise is naked. At first he takes no notice of your entrance, muttering a mantra of some sort. You note with apprehension the scarred over burn marks on his right arm and reddened bags around his eyes—the signs of a dabbler in the dark arts who occasionally gets singed.
As you debate in your mind whether or not to reveal yourself, the distinctive T-shaped headdress suddenly jerks to the side and you see his eyes light up in recognition of your presence. The mantra he was quietly chanting now urgently rises to an fever pitch, and you can sense the imminent blast of some force in your direction. You must fight the T-SHAPED HEADDRESS PRIEST (30 VITALITY). The T-Shaped Headdress Priest attacks by attempting to cast the INFERNO SPELL (2d6 DAMAGE). You must complete a Rock, Paper, Scissors test on your enemy’s behalf each round of combat to see whether or not he is successful in casting the spell. You cannot mitigate the damage of this spell with your weapon; instead, your only option is to cast a successful MINDCHILL SPELL in defense. You can, however, attack the T-Shaped Headdress Priest with your melee weapon when it is your turn in combat.
D3. As you round the corner you enter what appears to be an especially sacred part of the pyramid, with several alcoves holding coffins inside. You rifle through the first two and find nothing of interest, but as you approach the third innermost alcove you hear a desperate sound of intermixed sobs and gasps. A bloodied hand appears on the edge of the coffin and lifts up an even bloodier face. This is no leathery forefather, but rather another escapee like you, one who has made it all the way into the furthest bowels of the Sun Pyramid. As the figure climbs out of the coffin, however, it is clear that this is the end of the road. A dying woman flops to the ground in front of your feet and stretches out her hand to you, an anguished look on her disfigured face. Strips of flesh hang from every limb. “It was the Old Fire God,” she whimpers in a pitiful cracked face. “He’s just around the corner. So hot, so hot! It’s unbearable. He’ll kill you, too, unless you can stop his fire. I saw something in one of the other coffins on the other side of this crypt, but I couldn’t answer the riddle. That must be the key to getting past him.” As the breaths of the dying escapee start to quicken and her chest heaves up and down as if it will explode, she asks you to hold her wrist as the life seeps out of her. You feel the soft pump of her pulse grow more and more distant, until it synchronizes with your own pulse and you feel a surge of energy course through your own veins. The dead woman has given you the last of her vitality: INCREASE YOUR MAXIMUM VITALITY POINTS BY +10.
D4. Furious at the waste of health and resources initiated by Cocky Escapee, you spit on his lifeless corpse as it crashes to the ground with a fleshy thud. After all, aren’t there enough life-threatening horrors in this pyramid without having to fight each other? If you killed Cocky Escapee in less than three rounds, you can take one of his unused spell-casting items for yourself: one jawbone, one conch shell, or one flayed skin of a deadly enemy. And if you didn’t get the INFERNO SPELL, you might want to consider heading back and searching for it.
D5. Fused onto the rock surface of the wall are three symbols composed of precious stone mosaics. Since they are raised slightly from the rock surface on which they are mounted, you touch one of them gently and are startled to see the precious stones light up. It is accompanied by an echo of a ghostly, monotone voice: “Klik!” The sound reverberates throughout the chamber, though the word means nothing to you. You then proceed to touch the other two mosaic symbols and different nonsensical sounds bellow out of the darkness. It might be a good idea to study these three symbols and their associated pronunciations carefully:
D6. In this pitch-dark chamber, you suddenly collide with a seated figure whose presence you did not even notice until the very last second. Though the man was apparently meditating, he is now roused for battle and very peeved at your unexpected appearance. You must fight an IRATE MASKED WARRIOR (30 VITALITY, 9 AGILITY, 2d6+4 DAMAGE). If you win, you may take his SERPENTINE MASK (DEDUCT -3 ENEMY DAMAGE POINTS AFTER EVERY HIT RECEIVED IN COMBAT).

D7. In a narrow, twisting passageway toward the end of the wall and a corridor on your left you come across a grisly sight: a freshly dismembered corpse, clearly one of the escapees with whom you were thrown into this mess. The corpse looks like it was torn apart by a wild animal, but one far larger and fiercer than anything you’ve yet encountered. You grip your dagger harder than usual and press forward on your tiptoes.
D8. You may now attempt to cast the INFERNO SPELL as many times as you have mantras or the required items. If you fail to cast the spell even once, then nothing happens and the sculpture merely stares at you with those creepy bug eyes in mute silence. You try to pick it up but it is fused to the ground and impossible to dislodge. You may now exit this corridor. If, however, you successfully cast the spell, a wall of flames engulfs the sculpture and you watch in horror as it grows larger and larger until it is looking down on you. That whispering voice then speaks within your mind again: “You helped me, so now I will help you. Call upon me in battle and I will protect you with my life.” You can now add EL PATO LOCO (15 VITALITY, 9 AGILITY, 2d6 DAMAGE) as a special item on your inventory. For any single battle, you can call upon El Pato Loco to stand between you and your opponent and fight to the death on your behalf. You will simulate El Pato Loco’s combat attacks by rolling dice in accordance with its statistics just as you would for an enemy attack on yourself. If El Pato Loco is killed during battle, you must finish the fight yourself. If El Pato Loco survives the battle, it will shrink back to its original size and fuse itself to the ground again. You may not call upon it again.
E1. You tread lightly over the paved stones beneath your feet, anticipating a grisly surprise at any moment, but much to your relief this corridor is empty of both life and death. Instead you find yet another greenstone tablet etched with the following signs:

E2. You press on the sequence of five mosaic signs and feel your heart sink as all fifteen of them go dark in an instant and the sculpture of Mictlantecuhtli groans out loud. Your torch light is snuffed out and a fierce gale of wind swirls around you. In a flash, you are flung out roughly into a familiar looking chamber filled with fallen boulders. DEDUCT -10 VITALITY POINTS. You have been teleported back to the grid square marked B2 on your map. You take some solace in the fact that your torch has suddenly flared back to life—at least that’s something. In making your way back through this cave again, you will skip all STORYLINE entries except for any restorative mineral drips that may have been replenished. You will still encounter random enemies.
E4. As you near the end of a long corridor, you start to feel a chill in the air. Another three steps forward and you are wrapping your arms around your chest to keep warm. And then a wondrous sight—a small room at the terminus of the corridor encased in snow and ice, with a ceramic tripod perched on the frozen ground:
Sitting inside the tripod is a sphere of solid ice. If you would like to pick the sphere of ice up for closer examination, turn to S5. If not, you may leave this corridor and continue your wanderings.
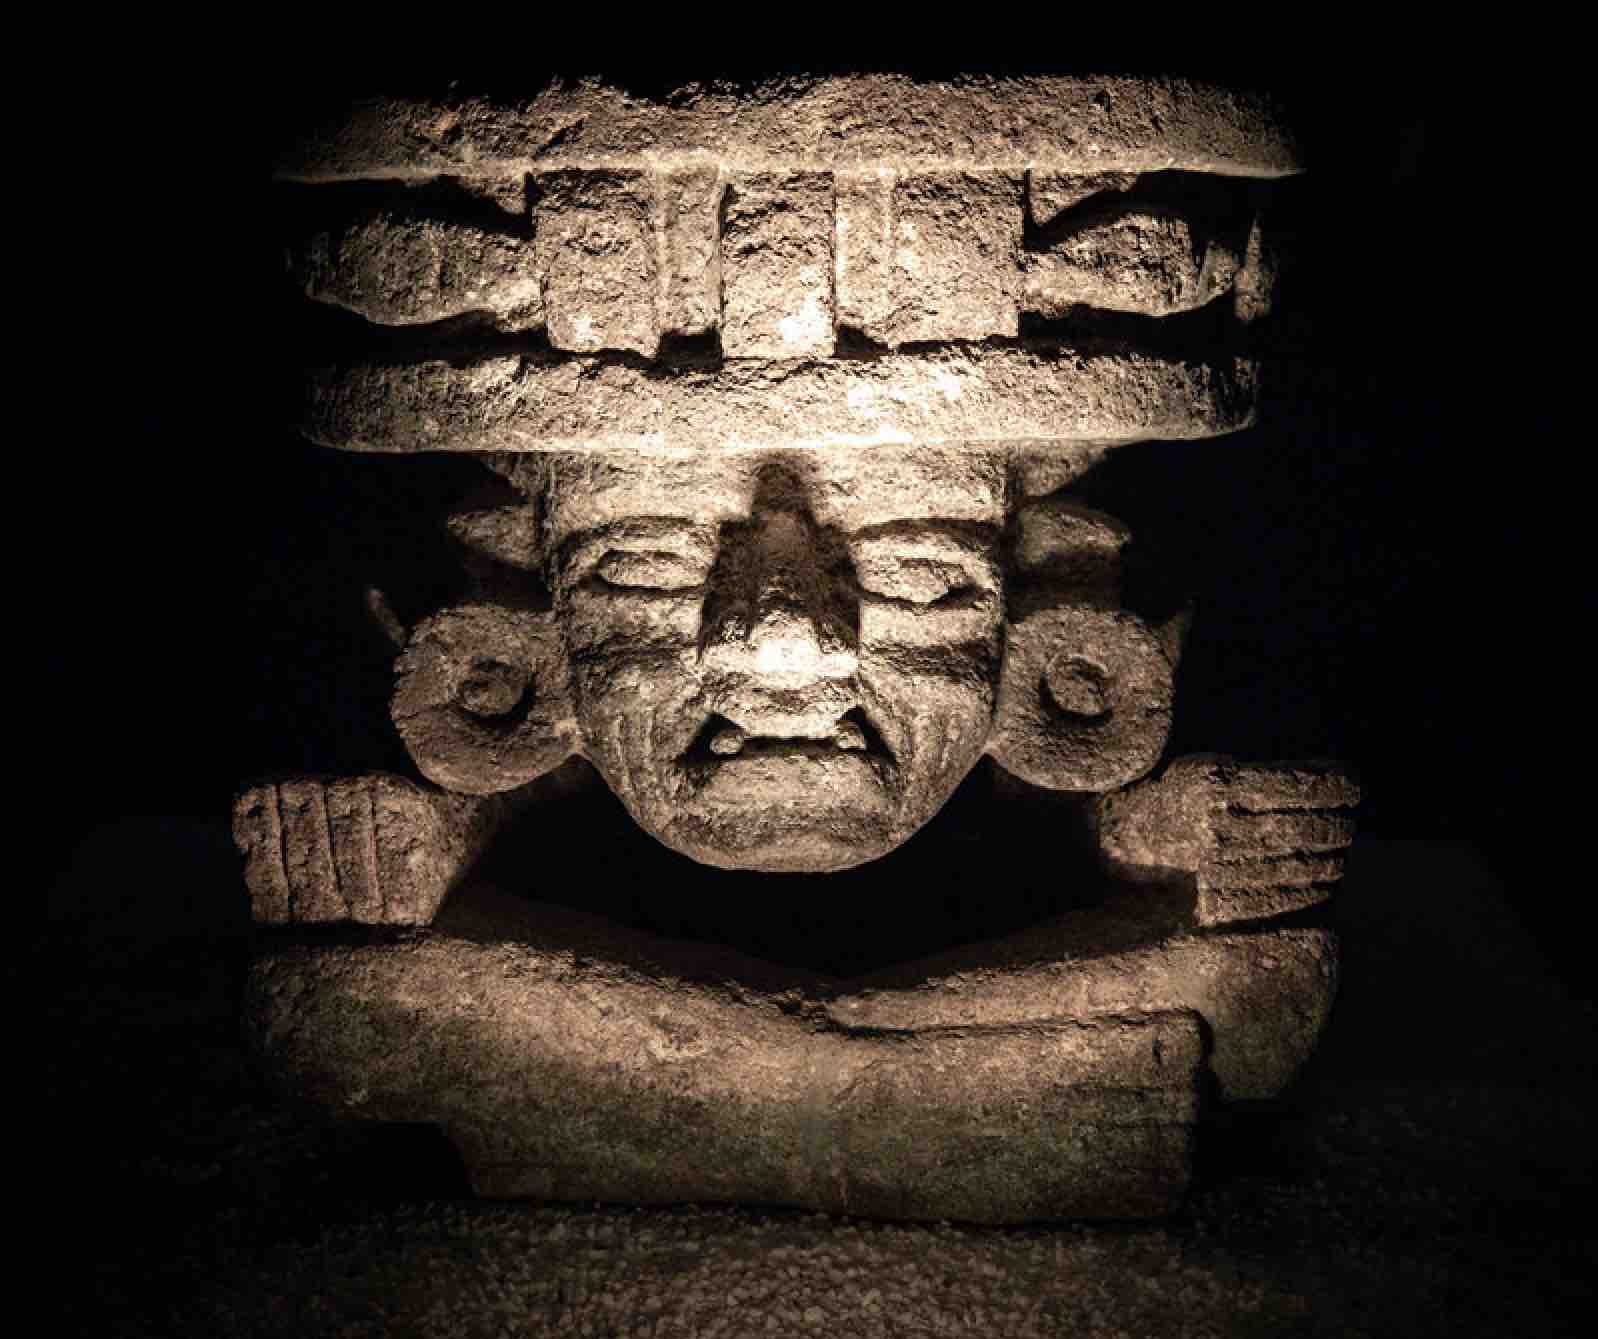
E6. Raised on a stone platform and eerily illuminated by the flickering light of your torch is an ugly stone sculpture of Huehueteotl himself, the Old Fire God. As you stand there mesmerized by this depiction of the god to whom you are currently being fed, its eyes suddenly flick open and something intangible latches onto your mind. You stand transfixed for several moments, then the eyes close once more and the statue again appears as it was when you first approached. Shaking your head, you realize that a message of some sort has been transmitted. Seared now into your mind are the images of four strange glyphs etched into a rock surface. You don’t know what the significance of all this is, but it is clear to you that both the glyphs and their locations are somehow important to your survival.
E7. The Feathered Serpent emits a head-shattering screech once it discovers you on its roost and flaps its enormous wings to ready for an attack with its claws and beak. And yet you notice an imperceptible limp and nursing of one of its wings, which appears to be malformed. You must now fight FEATHERED SERPENT (80 VITALITY, 10 AGILITY, 3d6+3 DAMAGE). Note: The final death blow must be an INFERNO SPELL to burn the Feathered Serpent into oblivion. If the Feathered Serpent’s Vitality does not decrease to “0” as a result of an Inferno spell, it retains 1 Vitality Point and the fight continues. If you win, turn to X7.
E8. Fastened to a massive stone pillar with a chiseled out ring on its surface is the thickest rope you have ever laid eyes on. This will require a truly intense slice of your blade to sever. To do so, you must perform the BERSERKER kendamamaneuver (#15) with no less than two additional cup captures after the initial maneuver. After 10 unsuccessful tries, you must fight a BLOWGUN WARRIOR (35 VITALITY, 9 AGILITY, 2d6+4 DAMAGE) who hears the pitiful sounds of your frustrated cries and comes to investigate. If this is the second rope for this cistern that you have managed to cut, turn to O5. Otherwise, you must find and cut the other one.
E9. As you make your way toward the far end of this dark chamber, a faint pinpoint of light grows larger and larger until it frames a dark silhouette of a figure whose mere outline you recognize from so many sculptures and murals in the City of Stone: Tlaloc, the mighty Storm God.
Then, without warning, the entire chamber bursts into blinding light as if five suns had exploded. You can see the Storm God clearly now, with a yellow staff fashioned in the shape of maize and gusts of wind streaming out of his mouth. “You dare to drain the sacred rains of the City of the Gods?” he bellows out. “I bring rain, and in so doing, I bring life to my flock. But I also bring thunder and lightning to those who defy me.” He then points his maize staff directly at you. “Prepare to become fertilizer!” You must fight TLALOC THE STORM GOD (60 VITALITY, 3d6 DAMAGE EVERY OTHER ROUND). Tlaloc attacks by sending a burst of thunder, lightning, and hail at you every two rounds, which will cause 3d6 damage. There is no defense against this attack unless you have obtained the STORM GOD DISC. If you have this item in your possession, roll 1d6 to determine its effects. If you roll 1-3, you take only 1d6 damage. If you roll 4-6, you take 2d6 damage. A successful JUGULAR kendama maneuver will not result in an instant kill against Tlaloc, but will instead inflict 5d6 damage on him. If you win this battle, you may turn to C4 on the map for Level 5: Courtyard of the Feathered Serpent.
F1. If you have the codeword “Toltec,” turn to Y4. If not, you find only the dank end of a narrow corridor whose walls are faced with stone blocks similar to nearly every other part of this pyramid. It seems strange that the Old Fire God would be guarding the entryway to this dead end. Seeing nothing of interest here, you turn around and exit the corridor.
F2. On the ground at the end of a curling corridor you find two greenstone figurines that you immediately recognize: the Founding Father and Nurturing Mother of your clan! You immediately drop to your knees and utter a sacred prayer seared into your memory by your grandmother.

The eyes of the statue then light up, and a voice appears in your mind: “Our clan lives on in you. You must overthrow the High Priest, who made an unholy bargain with our own god to destroy our civilization. Go now, and listen to your murdered ancestors.”
F3. You stop once more to catch your breath at the final bend in the labyrinthine passage to the base of the pyramid. The High Priest is now aware of your approach and clearly agitated at the failure of his security system. He turns to face you with an ebbing human heart held aloft in his right hand, dripping blood onto the ground. He then stuffs the heart into his mouth and rips off a large chunk, which he proceeds to chew and swallow. At the same time, he feel a movement to your left and notice for the first time that a bas-relief has been chiseled into the side of the walled corridor:

You immediately recognize the symbolic depiction of a jaguar eating a human heart, here stylized as a circle—an emblem of human sacrifice. Without warning, a stone jaguar leaps out of the bas-relief and takes you by surprise, digging its claws into your chest before you have time to react. DEDUCT -5 VITALITY POINTS. You must fight STONE JAGUAR (30 VITALITY, 10 AGILITY, 3d6 DAMAGE).
F4. Out of crack in the cave wall you see the familiar and most welcome sight of an AYAHUASCA PLANT (RESTORES 2d6 VITALITY) bravely pushing upward toward the glow of a wall covered in iridescent algae. There are enough leaves to grind up for a single use.
F5. Lying in the corner of the chamber are three jawbones and three conch shells, all of which you may take. The conch shells look different than those you have encountered previously, with intricate etchings along one side:
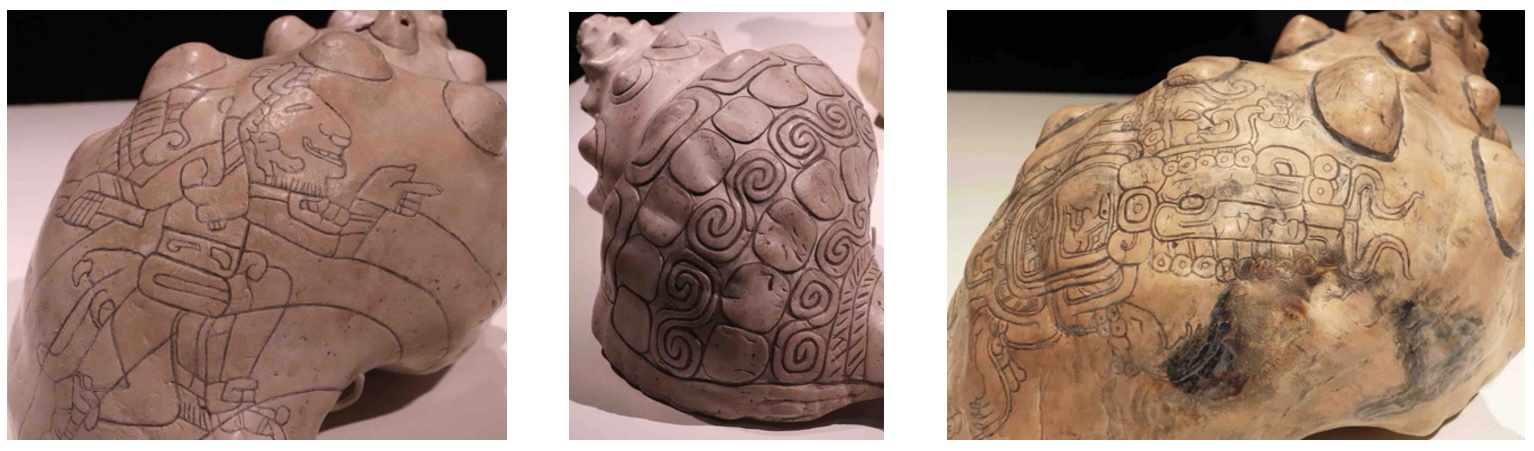
These conch shells were decorated by the ancient Olmec people and are infused with their powers. You may either use these conch shells to cast a magic spell or to restore 2d6 per shell by smashing it into dust and ingesting it. Each shell only be used once and for a single purpose, however.
F6. You insert the Medallion of Mictlantecuhtli into the sculpture’s disk-shaped mouth and hold your breath. After a few moments, coals of fire light up inside the eye slots and the mouth begins to move. “Say my name!” it thunders. Suddenly you sense a bright glow beneath your feet and look down to see fifteen of those mosaic signs lit up on the smooth rock surface. Your task seems obvious: you must press the five mosaic signs that spell out Mictlantecuhtli’s name and do it in the correct order. In choosing which sequence of signs you wish to press, you may consult your memory and notes but cannot flip back through previous STORYLINE entries:
F7. Attached to the corner of the ceiling is a pulley mechanism connected to a taut set of ten separate ropes. These will be harder to cut than the others. To do so, you must successfully perform the DISEMBOWEL kendama maneuver (#13). After five unsuccessful attempts, you must fight a MASKED WARRIOR (30 VITALITY, 9 AGILITY, 2d6+3 DAMAGE) who hears the sounds of your fruitless grunting and comes to investigate. If this is the second set of ropes you have cut for this cistern, turn to S4. If it is only the first, the cistern still holds.
F8. You enter a foul-smelling crypt of some sort and discover an uncovered rectangular coffin with an elaborately adorned skeleton inside. With the various strings and clothing long since rotted away, it now appears merely as a jumble of bones and precious stones. But amid all the clutter of bones and jewels you see the faint edges of a symbol that resembles others that you have found throughout this dungeon. With no reverence for the dead, you scoop up all the bones and precious stones and throw them to the side. You can now get a clear look at the image:

G1. After working your way through a long, winding passage, you find a taut series of ropes stretching from a stone handle in the corner of the floor up into the dark ceiling to an unseen point beyond. This must be the rope that holds the doors of the cistern in place and prevents the water from being dispersed throughout the floor. You push and pull on the rope and find that it is very tough and unyielding. You will have to perform the DISFIGURE kendama maneuver (#12) in order to cut the rope in two. After five unsuccessful attempts, you must fight a JAWBONE NECKLACE WARRIOR(27 VITALITY, 8 AGILITY, 2d6+2 DAMAGE) who hears your frustrated grunts and comes to investigate. If you succeed in cutting the rope in two and this is the second time you have done so on this floor, turn to C6.
G2. You fix the last of the greenstone tablets into the remaining hollow depression in the wall and wait for something to happen. Unfortunately, that something is the wooden grill beneath your feet opening up and disappearing, plunging you into a head-over-heels fall fifty feet into the abyss. Your fall is cushioned by a leathery pillow of some sort. As your eyes adjust to the daylight far above from where you fell, you realize that you are lying on the oversize scaled body of a monstrous boa constrictor of some sort. As you grope around for your weapon, you feel a sharp pain in your neck and collapse in a heap back into the serpent’s scales. The world grows dark and it is only a matter of moments before you are swallowed whole.
G3. The Olmec head evinces an awkward and none-too-comforting smile. “You are an observant one,” it says in a surprisingly friendly voice. “You may pass.” You watch in rapt attention as the facial features of the head transform gradually into protruding steps that will allow you to climb safely over and down its enormous surface. You may now pass beyond A5 and head toward either N1 or Y3.
G5. With his dying shriek, the Bird-Head Shaman shrivels up into a desiccated mummy not unlike the Leathery Forefathers you encountered on the upper floor and falls to the ground with a crunch. You may take his BIRD-HEAD STAFF (RESTORES +5 VITALITY EVERY 6 TURNS) if you wish. At the end of the corridor you find a circular shaft that descends straight down into darkness. Fortunately, there are groove marks cut out of the side of the shaft to make it easy to climb down. As you slowly make your way down the shaft, however, your torch reveals a tall and narrow niche chiseled out of the side of the volcanic rock. Inside the niche are three most peculiar figurines carved out of ivory, all identical in form but posed slightly differently:

This can’t be good, you think to yourself. Nevertheless, the only out of your ordeal is forward, so you press on and jump down the last few feet to the floor below. You may now turn to J4 on the map for “Level 3: Mysterious Tunnel.”
G7. You step into the last alcove on this side of the crypt. Inside you find not another coffin like the others, but rather a towering stone statue in the likeness of a woman:

As you stand there taking the measure of the statue, suddenly its eyes light up and its mouth begin to move as if it were speaking. But the only voice you hear is inside your head. “I am the Water Goddess. Only I can permit passage into what is sealed beyond.” Then the voice in your mind is replaced with familiar images of the painted scenes of wild and fantastic beasts that you have encountered throughout this pyramid. The animals begin to move, charging toward you. A series of dots floats around their charging bodies, weaving in and out of their swift-moving legs and antlers. Somehow, you instinctively know what the Water Goddess wants you to tell her. In total, how many dots appeared alongside animal bodies in the four paintings you encountered in the Sun Pyramid? Divide that number by 3, then preface it with the same letter that marked the grid location of the drawing of two stags. In doing so, you may consult your memory and notes, but may not flip through the STORYLINE entries. When you think you know the answer (i.e., have identified both a letter and a number), turn to that entry. The correct answer will make immediate narrative sense, while an incorrect answer will not. If you cannot figure out the correct answer, the statue looks at you impassively and the images disappear from your mind—perhaps you need to go take another look at those drawings!
H1. You enter a large chamber littered with boulders and the skulls and skeletons of cave bears. Most of the boulders are of little interest, merely blocking your line of sight, but the one immediately in front of you has a carefully placed bear skull on its edge, with the fangs curling over the edge of the rock. Someone put this here deliberately, and you suspect it was not done in innocence:

H2. Growing through the cracks of the stone wall are a few wispy branches of an AYAHUASCA PLANT. You may collect the leaves and grind them up for a single serving of this psychoactive concoction, which restores 2d6 VITALITYwhen used.
H4. As you approach the end of a curling corridor, a mysterious gust of wind snuffs out your torch and a swirl of reddish lights engulfs you. The lights then coalesce into a sight for sore eyes: your mother, who was buried alive in the Teotihuacano sack of your village. Reduced to tears and wonder, you can only watch dumbly as the vision begins to speak to you somewhere in the recesses of your mind. “You may not know, darling, but Mictlantecuhtli was our clan’s god of old. The Teotihuacanos, cursed be their name, sized his idols and imprisoned him in their city of stone. But they do not worship him as we did—Mictlantecuhtli got no pyramid to honor him, and the Teotihuacanos rebranded him from the God of Life to the God of Death. He longs for worship. Find his medallion. It must be somewhere in this cave, enshrined in eternal darkness with the burial and destruction of our land. Find the Medallion of Mictlantacuhtli and restore the glory of your ancestral gods!”
H5. You plunge the blade of your weapon into the High Priest’s bloody corpse repeatedly, your blind rage sated only after gouging out both of his eyes and tossing them to the rattlesnakes in the pits below. Having watched the human embodiment of their gods fall like any other mortal, the High Priest’s guards drop their weapons and flee in every direction except toward the pyramid. You may now proceed up the path toward Quetzalcoatl’s Roost. Until you reach Q7, you will adhere to the same random rolls and their consequences that you used for Level 5.
H6. You draw a crude stag to the left of the tail with six dots, taking care to connect the tail with its rear end. Then you wait. Without warning, the wall with the enigmatic painting bursts open with a great shattering and mighty roar. When the dust settles, you find yourself confronted with the flesh-and-blood embodiment of the magnificent stag depicted in one of the paintings on the upper floor. And he is clearly not happy to see you here. It seems likely that you drew the wrong beast. Nevertheless, you now have no choice but to fight MEGALOCEROS (25 VITALITY, 9 AGILITY, 2d6 DAMAGE). If you defeat this beast, you step over its steaming carcass, gingerly avoid its sharp antlers, and pass through the hole in the wall created by its dramatic appearance and press onward toward the grid square marked X9.
H7. Inside a modest alcove you stumble upon a rare and welcome sight: a garden filled with AYAHUASCA PLANTS (RESTORES 2d6 VITALITY). This must be the personal stash grown for the High Priest and his fellow rulers. As you stand there mulling your good fortune and thinking it too good to be true, you feel a sharp pain in your shoulder and yelp out in pain. Behind you is an old man with a scythe for gardening and he has just planted his blunt tool into your flesh. DEDUCT -10 VITALITY. You must now fight the AYAHUASCA GARDENER (15 VITALITY, 7 AGILITY, 2d6 DAMAGE). If you win, you may take enough ayahuasca leaves to make four healing concoctions.
H8. You watch in horror as several strips of skin peel away from your arms and legs and fall limply to the ground. While you are distracted by the intense heat, the Old Fire God swings his heavy greenstone ball at your chest. Fortunately, you suffer a glancing blow and merely lose a thicker strip of melting flesh. DEDUCT 10 VITALITY POINTS. Struggling to gather your senses, you manage to turn around and run stumbling out of this corridor of horrors and back into the slightly less horrific bowels of the pyramid. Clearly, you will not be able to even stand and face the Old Fire God, much less kill him, unless you can somehow find a way to neutralize the intense heat that surrounds him.
I2. You plunge your blade deep into the beast’s shoulder for the last time and it collapses to the ground with a sickening moan and shudder. Intestines, blood, and organs litter the ground. The shaman has watched the melee from the back of the tunnel, standing perfectly still and betraying no trace of emotion. But now he begins to rattle his bird-head staff, points it at your head, and speaks in an unearthly voice. “So. You have knocked off the Old Fire God and discovered the source of your people’s misery. I think you would have been happier going to your grave without knowing. Now you will still die in agony, but fully aware of the rain of fire and ash that accompanied the last death throes of your clan. The ancient beasts of a different world still roam down there in the depths of the earth, buried but very much alive. Come to me. I await your triumphant return to the world of light. I will tear out your heart with my very own hands, and use it as an offering to Quetzalcoatl, the Great Feathered Serpent.” By now it is clear that the shaman is merely a vessel for the High Priest above. But that vessel is standing between you and a pit that appears to offer an exit out of this cave, so there appears to be only one path forward. You must fight BIRD-HEAD SHAMAN (15 VITALITY). Instead of attacking you with his staff, Bird-Head Shaman attempts to cast the MINDCHILL SPELL (3d6 DAMAGE) during combat. Each round of combat, you must do a Rock, Paper, Scissors Test on your enemy’s behalf to see if he successfully casts the spell or not. If he wins 3 out of 5 tests, the spell is successful and you must roll 3d6 to determine how much damage you take. The only way to block his spell is to successfully cast an INFERNO SPELL in response. If you win, you may proceed to the grid square marked G5.
I3. You cry out in joy at a side room that is positively glowing with iridescent goo excreted by the many stalagmites and stalactites that fill this space. You may lick all the goo off and RESTORE YOUR VITALITY POINTS TO MAXIMUM HEALTH. You must, however, wait 10 turns before you can return to this room and restore your health again.
I4. As instructed by the Keeper of the Beasts, you may now attempt to perform a single “Bruise” kendama maneuver (#6) before the first round of combat begins. Because the puma is already poised to pounce, you may not practice this maneuver anymore and your first attempt will count—for better or for worse. If you succeed in pulling the maneuver off in one try, the Escaped Puma will submit to your control and accompany you in your wanderings and battles until it is killed, absorbing all enemy damage meant for you. In addition, it will attack your enemies—in accordance with its statistics and accompanying dice rolls—once each round in addition to any damage you inflict with your own weapon. (Record the Escaped Puma’s statistics on your CHARACTER SHEET). If you fail to perform the “Bruise” kendamamaneuver in a single try, however, you must now fight the ESCAPED PUMA (20 VITALITY, 8 AGILITY, 1d6+4 DAMAGE). If you win, you may take the flayed skin of a deadly enemy.
I5. You pass around a series of fallen boulders and discover a horrific scene of ancient slaughter. Innumerable skeletons, apparently of Mantika warriors, are jumbled up in a massive pile against the wall, their oblong skulls littered about in disarray. Upon closer inspection, you find that many of the skeletons are charred black as well, as if a great fire burned over their corpses. As you sift through the piles of bones, you eventually find the culprit: two unused “Exploding Maize” canisters.
There must have been several other canisters that detonated successfully, trapping these unfortunate Mantika warriors in this last refuge and burning them alive. For the first time, you feel a slight twinge of pity for these doomed men—ancient grudge or not, being roasted alive is no way to go. You may take the two undetonated EXPLODING MAIZE canisters if you wish; when used in battle, each one will inflict 3d6 on your opponent.
I6. You step back in horror at the thought of slitting this man’s throat, so he turns the dagger on himself and slashes his own throat. As he keels over to the ground, you watch in amazement as his body disintegrates into an ethereal mist and dissipates into the air. You now realize that his whole act was merely an elaborate illusion and test of some sort, and you may have missed an opportunity to gain a new ability.
I8. Sitting on the ground at the end of a short corridor is a small but most curious sculpture:

As you contemplate its eerie green eyes, suddenly a voice whispers in your mind. “Help me help you.” What would you like to do? If you want to attempt the STUN kendama maneuver (#5) on the sculpture, turn to L4. If you want to attempt to cast an INFERNO SPELL on it, turn to D8. If you want to utter the name HUEHUETEOTL in its presence, turn to L7. If you don’t want to do anything, you can leave this strange sculpture behind and exit this corridor.
I9. You tell Pitlac you don’t feel comfortable handing over your dagger to anyone, even though he seems like a nice guy. “Yeah, I get it,” he says. “Well, good luck. May we meet again in the world of the living.”
J1. Your approach toward the far end of this high-walled corridor is blocked by a gap in the pavement below. In place of stones is a wide trench about 10 feet across—far too wide to jump over. And it is full of rattlesnakes. On the other side you see another greenstone tablet with some sort of design, but it is beyond your reach and vision from this vantage point. There appear to be only two ways to cross the trench. The first option is to cast three (3) INFERNO SPELLS to roast all the snakes in the pit and then simply walk through the charred remains. Alternatively, you could jump into the trench and perform a BERSERKER kendama maneuver (#15) that consists of at least two cup catches beyond the initial maneuver. Every five (5) failed attempts will result in a RATTLESNAKE BITE (DEDUCT -10 VITALITY POINTS). If you succeed in crossing the rattlesnake trench, turn to W1.
J2. On the ground at the end of the grand corridor you find a heap of human skeletons all piled up in disorder. You sift through them quickly to see if there is anything of use and note to your dismay that someone has already removed all the jawbones. You do, however, discover a scuffed up tripod buried under all the skeletons, and it appears to be depict a warrior using a blowgun. And indeed, once you clear out the inner cavity of the tripod of assorted bones, you find a plain but perfectly usable blowgun along with 5 darts. This must have been used as part of some ancient ceremony that is no longer practiced. You may add this blowgun and 5 darts to your inventory if you’d like.

Though blowguns are fairly deadly, hitting your mark in combat is largely a matter of chance for someone untrained in their use—and that means you! As a result, to use this blowgun in combat, roll 1d6 and check the result: 1-3 is a HIT (2d6+3 DAMAGE) while 4-6 is a MISS. Record these details on your CHARACTER SHEET. You can only use a blowgun so long as you have available darts in your inventory, and you cannot combine use of the blowgun with any other weapon or magic spell during the same round of combat.
J3. You pass through the far edge of a pitch-dark chamber and feel a sense of foreboding with every step you take. Your tentative movements, however, arouse no tangible threat and you pass through the chamber without incident. Off to the side, though, you can make out the outline of a seated masked figure of some sort and, even further across, a field of broken pottery shards.
J4. Exhausted from the physical and mental trials of the cave above, you take weary stock of your new surroundings. You are in a high and narrow tunnel, with fallen boulders from the ceiling above littering the path forward. You see no stone architecture of any sort, just the raw contours of ancient rocks and mineral accumulations of various sorts and shapes. If the cave above was a mix of ancient fiery destruction and manmade ruins, then this floor appears to be primeval in the extreme. Haunting images of enormous and fearsome beasts fill your mind as you press forward into the gloom ahead.
J5. You have reached Quetzalcoatl’s Roost, where the Feathered Serpent himself awaits you. Five potted AYAHUASCA PLANTS (RESTORES 2d6 VITALITY) encircle the Feathered Serpent on Quetzalcoatl’s Roost. Roll 2d6 to determine how many Ayahuasca Plants you can collect before the Feathered Serpent discovers your presence: 0 plants (2-4), 1 plant (5-7), 2 plants (8-10), 3 plants (11), 4 plants (12).

If you managed to kill the High Priest in three rounds or less, turn to E7. If you killed the High Priest in four rounds or more, turn to L5.
J6. You frantically try to snap the wooden bars of the cage-trap so you can slip out and tumble to the ground before you are pulled up too high, but fail to do so. The trap lifts you 15 feet above the hard volcanic ground. You have no other option than to cut away at the rope that holds your trap aloft. With a sharp intake of breath, you slice away the last thread and plummet to the ground as your stomach plunges into your throat. Splintered wood is everywhere, your arms and legs are bruised and scraped, and you have a ringing headache. DEDUCT 8 VITALITY POINTS.
J7. You press on the sequence of five mosaic signs and feel your heart sink as all fifteen of them go dark in an instant and the sculpture of Mictlantecuhtli groans out loud. Your torch light is snuffed out and a fierce gale of wind swirls around you. In a flash, you are flung out roughly into a familiar looking chamber filled with fallen boulders. DEDUCT -10 VITALITY POINTS. You have been teleported back to the grid square marked B2 on your map. You take some solace in the fact that your torch has suddenly flared back to life—at least that’s something. In making your way back through this cave again, you will skip all STORYLINE entries except for any restorative mineral drips that may have been replenished. You will still encounter random enemies.
J8. You close your eyes, take a deep breath, and step into the center of the swirling tornado of poltergeist abominations. The phantoms begin to shriek in delight and laughter, mocking you for joining them. “We’ll feast on a fresh soul tonight!” they shout into your brain like a pounding headache. Bracing yourself for utter annihilation, you open your eyes and see hundreds of ghouls pouring into your chest, causing you to scream out at the top of your lungs until you pass out and collapse on the floor. When you awake, you feel much weakened. DEDUCT -15 VITALITY POINTS. And yet, you also feel somehow more fortified and mature, as if you have confronted some great fear and overcome it, bearing unseen psychological scars as testament to your bravery. You have now learned the SPECTRAL SHRIEK SPELL.
J9. At the end of a short corridor decorated with disordered mosaics and stone rubble you find the skeleton of a long-dead warrior whose bony hands still clutch an obsidian-tipped spear. Remarkably, whatever hardened those branches and roots at the entry of this cave has also hardened the wooden shaft of the spear, which is in excellent condition. If you would like, you may exchange your Obsidian Dagger for an Obsidian Spear. The Obsidian Spear will allow you to add an additional +3 DAMAGE POINTS to every successful kendama attack in combat. The warrior’s ribcage is also partially wrapped in in a RATTLESNAKE SKIN VEST that is pierced in multiple locations. Nevertheless, it is still in fairly good condition. If you wear it, you may DEDUCT -2 DAMAGE POINTS from every enemy attack you absorb. The dead warrior is also wearing a rattlesnake skin helmet, but something about it doesn’t seem quite right. As you kneel down to remove the helmet, you discover an oblong skull beneath it.

You catch your breath. This is the shape of skull exhibited by the Mantika people on the other side of the mountains, the ancient enemies of your people—they tie wooden boards around their newborn babies to mold the soft skull into precisely this shape. What is the skeleton of a Mantika warrior doing here? Needless to say, the rattlesnake skin helmet is not wearable, since it was made for an entirely different shape of skull.
K1. Soon after rounding the main wall separating two sections of the pyramid, you come a fellow escapee who appears to be muttering to himself. Upon hearing your footsteps, he jerks his head around with cat-like reflexes and sizes you up. You can now see attached to his hip a one jawbone, one conch shell, and the flayed skin of a spotted jaguar—so he’s already proven himself in battle. Then, none to your liking, a wry smile forms on his lips, one tinged with a hint of arrogance. “Did you touch that floating orb of flames in the sun-skull room?” he asks, almost in a mocking tone. Without waiting for any response, he continues. “Well, I did. And I’ve been waiting for someone to try it out on. It will complement my skill with the dagger nicely!” You must fight COCKY ESCAPEE (VITALITY 15, AGILITY 7, DAMAGE 1d6+3). For the first three rounds of combat, Cocky Escapee attempts to attack you by casting the INFERNO SPELL. Roll 1d6 to determine whether or not his spell casting was successful (1-3 success, 4-6 fail). If successful, you take 2d6 damage, which you can only defend against with a successful INFERNO SPELL of your own. However, if Cocky Escapee fails to cast INFERNO SPELL, you take no damage and proceed to the next round of combat. After three rounds of combat, Cocky Escapee runs out of items with which to cast the spell and resorts to standard fighting tactics. If you win, turn to D4.
K2. You approach the massive stone head and are awed by its size and workmanship—your own head barely reaches up to its eyes:

But nothing prepares you for what happens next: the eyelids open up, color suffuses its lips and nose, and the mouth begins to speak. “Much comes down from above, but few things rise up from below. At long last, it seems that the Old Fire God has missed his meal. But would that it was not one of your ilk who felled him. The people of the Addercore: I remember your kind, it was your ancestors who burned our villages to the ground, raped our women, stole our children, and tore out the hearts out of our warriors’ chest. Now no one speaks of the Olmec anymore, no one remembers us. You want me to shed a tear for the fate of the Addercore and Mantika clans? You think you are innocent victims of a crueler people? Ha! The Teotihuacanos were not the only ones who shed the blood of the less fortunate. But hear me now: you can begin to atone for the sins of your forefathers by putting an end to the desecration of what remains of us scions of the Olmec. Up there, in the Courtyard of the Feathered Serpent, they plug the drains and fill it up with water. Then they float thousands of Storm God vessels over the manmade sea and re-enact their blasphemous rituals of the creation of the world. They do this every full moon. The ceremony ends when they unplug the drains and flush all the water down into this underground cistern, shattering the Storm God vessels and turning our last refuge into a toilet. Do this for me: drain the cistern of its unholy water by cutting the ropes that hold its walls in place. If you do that, you may just find a way out of this Olmec grave and back into the endless bloodshed of your own world.” Whether you want to do his bidding or not, it seems you have little choice unless you can teach yourself to swim on a moment’s notice.
K3. In a side alcove set apart from the main chamber you find three more warrior skeletons with oblong skulls that appear to be more evidence of the ancient slaughter of the Mantika people. Since their necks are already severed from the rest of the skeletal torso and the heads are cracked, it will not be difficult to detach 3 jawbones for your inventory if you would like. You do so with relish, as your grandmother’s stories have not inclined you to mourn for the Mantika.
K4. Waiting for you at the end of this long corridor is a stern-faced man with a magnificent golden hawk mounted on his arm. This is no run-of-the-mill bird-of-prey: when soaring through the skies, the golden hawk has a wingspan of more than ten feet and sports murderous claws that cleave right through its prey.

You must now fight GOLDEN HAWK AND TRAINER (40 VITALITY, 9 AGILITY, 2d6+4 DAMAGE). When you attack, you are attacking the trainer, not the golden hawk, which remains hovering in the air out of your reach. When you defend, however, you are defending against the golden hawk, who attacks you on its trainer’s commands. Be sure to keep track of the total number of damage points you have deducted from the golden hawk’s attacks through your kendamadefense. If you manage to kill the trainer, turn to T5.
K5. With bated breath, you cautiously extend your arm into the ball of flames and feel no scorching heat whatsoever. Emboldened, you lay your hand around the inner orb and feel a shudder of warm energy course through your veins, until finally it reaches up into your head and turns your face flush with heat. You revel in this joyful spark for several moments until a crescendo of pressure bubbles up inside your brain and explodes with a shattering “pop!”, knocking you to the ground. Lose 5 VITALITY POINTS. As you crawl back up to your knees, you regather your senses and are aware of a heightened sense of perception, like a wolf in the forest. The orb of fire radiates with a longing that resonates powerfully in your soul, and you cannot help but smile back at it with tears streaming down your eyes. You have now gained the ability to cast the INFERNO SPELL. Consult the USE OF MAGIC section to learn how to cast this spell during combat.
K6. Your passage through the second drained cistern was filled with broken pottery vessels bearing the image of Tlaloc, the Storm God. These must be dumped down here with the drained water after the completion of every ceremony in the Courtyard of the Feathered Serpent above.
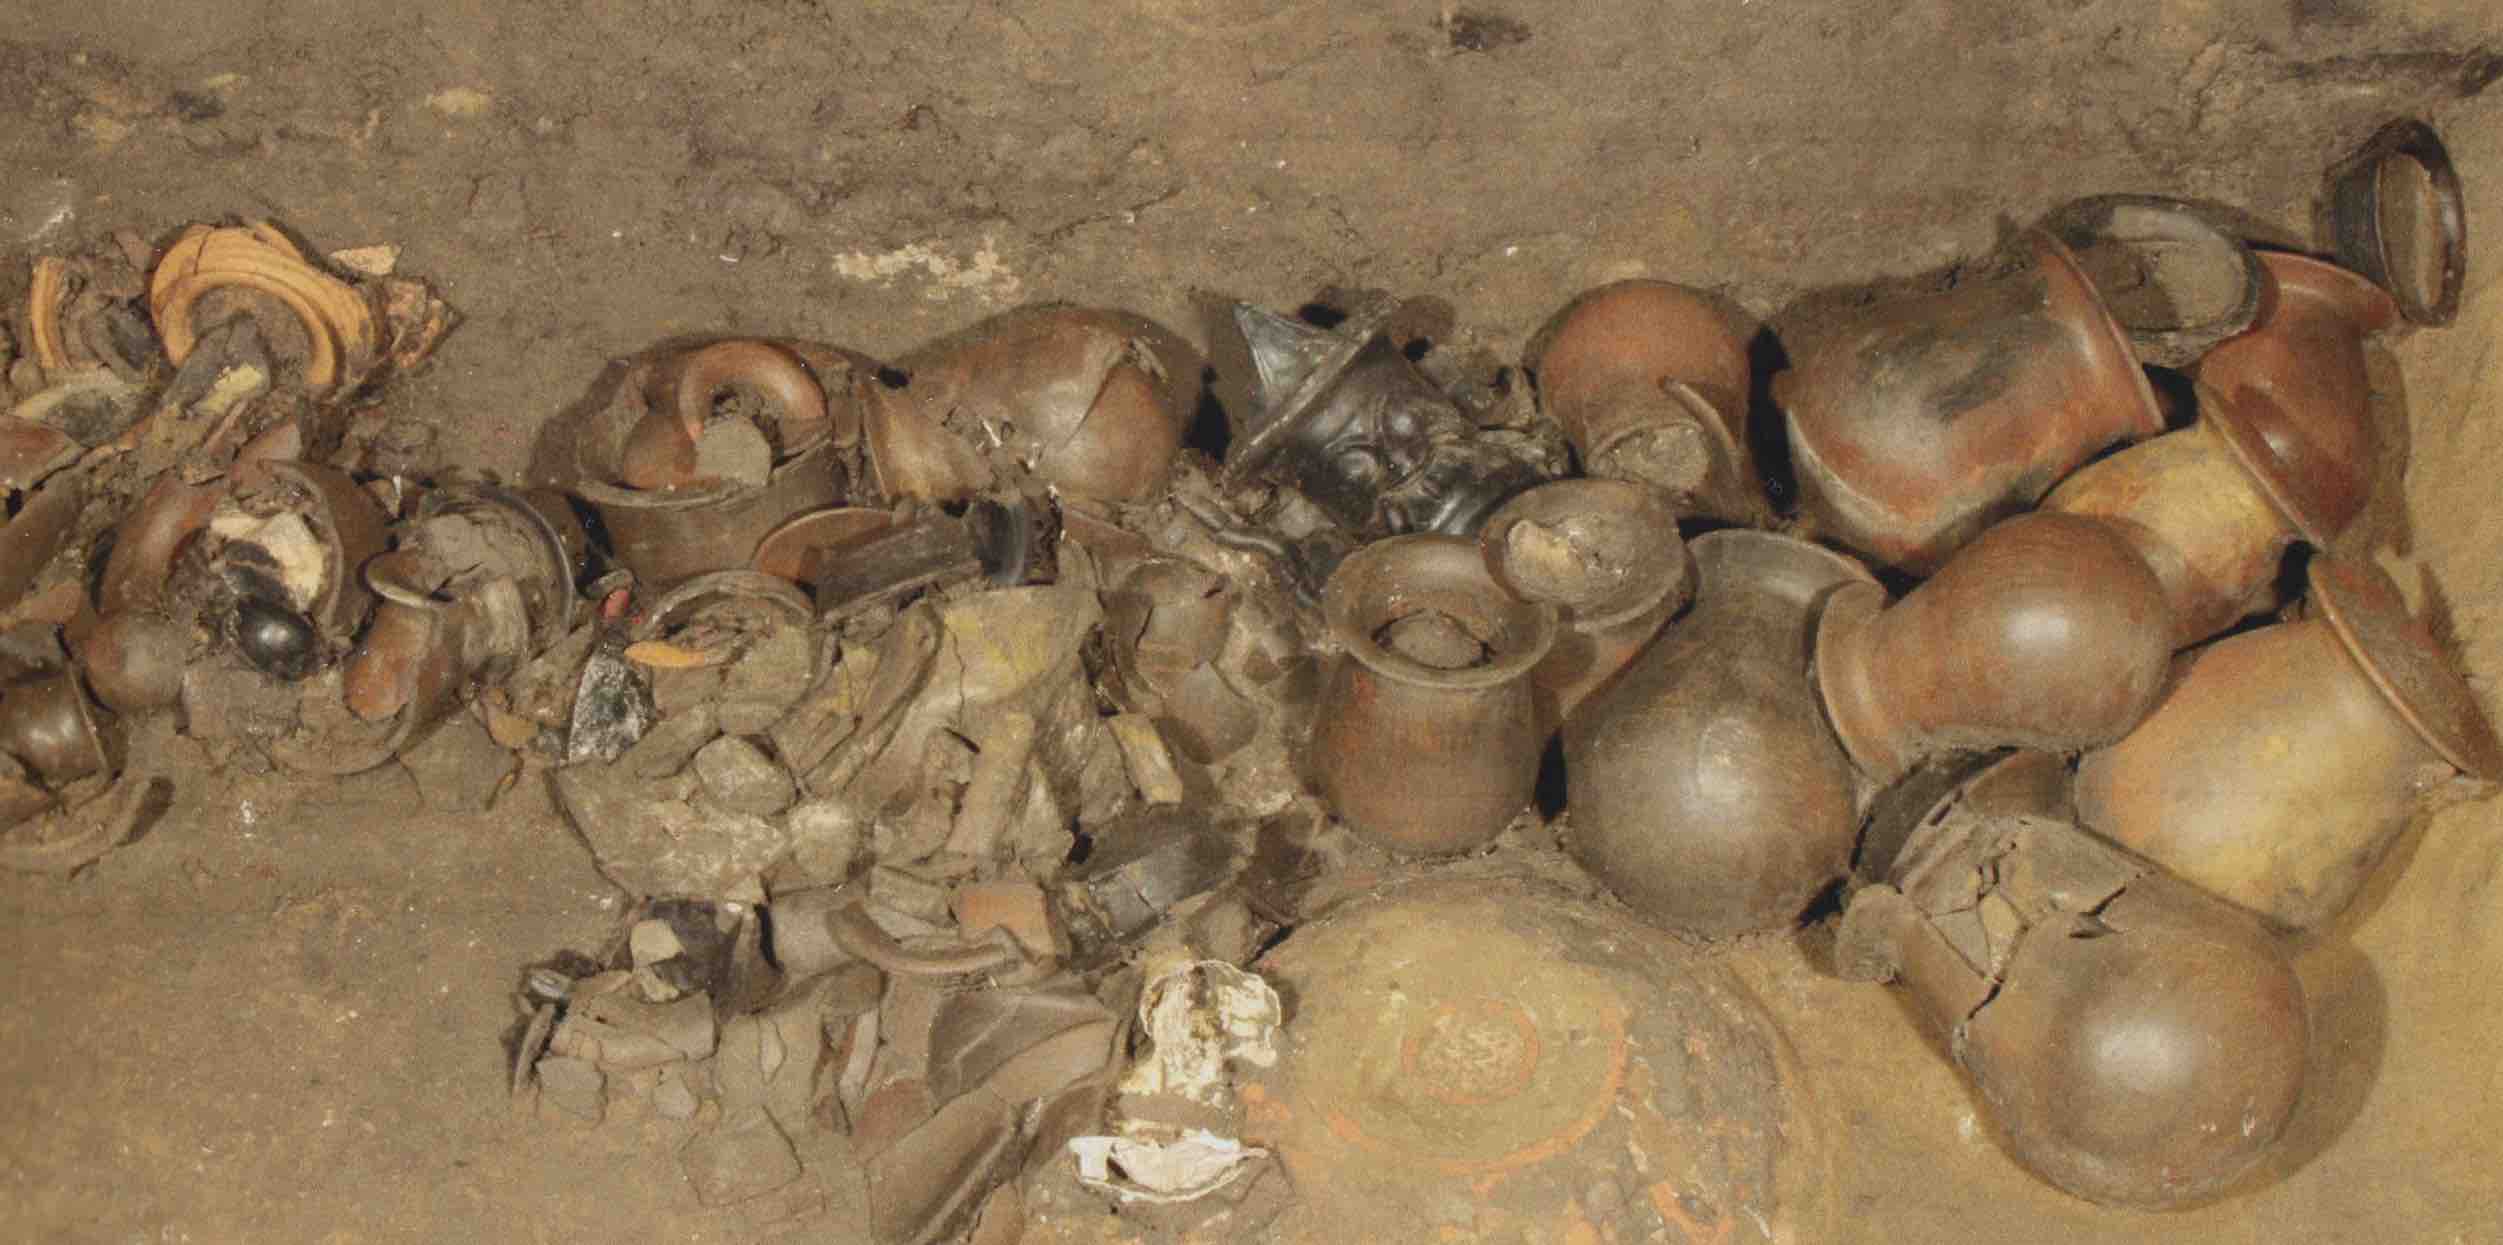
Unfortunately, your feet are now covered in bloody lacerations. DEDUCT -5 VITALITY POINTS. Much to your disappointment, your passage through the second drained cistern merely brings you to a third cistern filled with dark waters. Apparently you’ll have to find more ropes to cut!
K8. As you make your way tentatively across the long dark corridor, you hear an ominous sound: the roar of a lion. By now you are used to cave bears, bats, and even woolly mammoths, but a lion, too? And yet there is no other path forward, unless you know how to move through solid rock. You resign yourself to the inevitable and steel what remains of your nerves. It doesn’t take long before you see a strange furry figure knelt over something, with its back turned to you. Once it hears you approach, it turns its head around and fixes a malevolent glare at you. A shiver runs down your spine: it is that of a lion’s head attached to a man’s furry body, the living embodiment of that strange ivory figurine you saw when you climbed down to this cave hours ago. Once you get over your initial shock at the appearance of this hybrid beast, you notice that its muzzle is covered in blood. You take a few steps closer and see that it has been feasting on human corpses: not more escapees, but instead what appears to be a T-Shaped Headdress Priest and an Open-Chest Warrior (though you can’t be certain the beast itself didn’t rip open that chest). Have they been thrown down here as food or sacrificial offerings to this monstrosity? Having stared you down for what seems like an eternity, the beast lifts itself up off its haunches and rises up to its full height, towering over you. It gives a mighty roar and starts to charge. Then from behind you hear a much smaller but just as vigorous yell and turn your head to see Pitlac charging past you in a mad rage straight at the beast. “Forgive me for what I said earlier,” he shouts. “Let me redeem myself and unite the last of our clans. For the Mantika!” You and Pitlac together must fight LIONMAN (70 VITALITY, 10 AGILITY, 3d6 DAMAGE). Though PITLAC (25 VITALITY) is clearly already severely wounded, he appears eager to bear the brunt of Lionman’s attack as a form of penance and tells you to hang back and attack only when a safe opening presents itself. Each round of combat, you may initiate two attack attempts on Lionman with your kendama: one on behalf of Pitlac and one of your own (Pitlac gets two attempts per round of combat to pull off a successful kendama maneuver.) Lionman’s attack damage will fall entirely on Pitlac until Pitlac is dead; then you will begin to take damage. A successful JUGULAR kendama maneuver will not result in an instant kill of Lionman, but instead will inflict 5d6+3 damage. If Pitlac dies during the battle there are no sappy final words for you to hear—you watch in muted horror as his wrecked body is smashed against the wall and Lionman tears his head off with a single horrible swipe of his massive paw—and then you continue the battle. If both you and Pitlac survive the battle, turn to R7.
L1. At the end of a non-descript corridor you find etched on the original rock wall surface in a frame of stone bricks the following image:

Surely this was put here for a reason. It would probably be a good idea to look at it thoughtfully for a moment or two.
L2. After rounding the first perimeter of the Pyramid of the Feathered Serpent, you now gain a clearer view of the main processional avenue of Teotihuacan, through which you were led as one of many sacrificial victims just a few days before. Throngs of people are now beginning to stream out into the broad street, their curiosity and fear roused by rumors of the High Priest’s death and the supernatural disturbance on Quetzalcoatl’s Roost. Probably it was the guards who fled from the base of the pyramid who are responsible for the sudden panic among the city’s populace. You wonder if they can be roused any further to a higher end?
L3. At the end of a non-descript corridor you find a young man huddled on the ground with his arms wrapped around his knees. He is visibly sobbing, though you can find no evidence of any wounds to his body. Suddenly you looks up at you, wipes away the tears from his eyes and snot from his nose, and launches into an impassioned monologue. “What is the point of it all? Life is not worth living. We’re all just going to die anyways. Either I’m food for the Old Fire God or a torn-out heart for the Storm God. The same goes for you! Please, just help me end it all. I can’t go on anymore.” Much to your shock, he holds out his obsidian dagger and offers it to you. “Please, slit my throat. Otherwise, I’ll do it myself.” For a brief moment, you wonder how someone who has made it this far through the ordeal could choose to end it all here. But you have only a moment to consider such things, as the man looks ready to slit his own throat. “I know I’m a coward,” he wails. “But I can’t just go on anymore. This place is the bane of all life!” What will you do? If you take his obsidian dagger and slit his throat, turn to R8. If you decline to do so, turn to I6.
L4. You attempt to perform the “Stun” kendama maneuver on the strange sculpture and after several tries eventually succeed. The sculpture smashes into tens of fragments and litters the ground. You wait for several minutes to see if anything else will happen, but it does not. You may now exit this corridor.
L5. The Feathered Serpent emits a head-shattering screech once it discovers you on its roost and flaps its enormous wings to ready for an attack with its claws and beak. It rises nimbly into the air, flush with the splendor and arrogance of supernatural strength, and prepares to skewer you with its claws. You must now fight UNDIMINISHED FEATHERED SERPENT (100 VITALITY, 11 AGILITY, 4d6 DAMAGE). Note: The final death blow must be an INFERNO SPELLto burn the Feathered Serpent into oblivion. If the Feathered Serpent’s Vitality does not decrease to “0” as a result of an Inferno spell, it retains 1 Vitality Point and the fight continues. If you win, turn to X7.
L7. You utter the name of the Old Fire God, “Huehueteotl.” The sculpture responds with a terrified squawk, opening and closing its beak and flapping its wings. After a flurry of motion, it then explodes into hundreds of tiny fragments, hitting you in the face with several sharp shards. DEDUCT 3 VITALITY POINTS. You wait around for a few more minutes to see if anything else will happen, but it does not. You may now exit this corridor.
L9. You slide down the “stone waterfall” and feel a brief rush of adrenaline until your joyride ends with a painful thud on the moist but solid ground below. You are now on the grid square marked L9 on the map for Level 2: Primeval Cave. You cannot climb back up to Level 1. Once you get your bearings and cast a glance around, you realize that you are standing at the end of a very narrow corridor in which the walls and ceilings are composed of a haphazard mix of volcanic rock and ruined architecture of some sort. You think back on the image planted in your mind by the Water Goddess of a world buried under a volcanic eruption—and of the otherworldly beasts that died along with it. But it wasn’t just oversize animals that perished. What about the people who were hunting them? As you take a closer look at the three walls around you, you discover a different set of haunting images on each one:

These images stir a faraway glint in your eyes. Vague memories of stories your grandmother told you when you were just a toddler, long before the destruction of your village. Something about her great-grandparents hunting fearsome game and marking the loss of their fallen hunters with palm prints in sacred caves. It was said that such handprints sealed off the vengeful spirits of dead hunters in the netherworld, to remain undisturbed for all time. Or were these all just idle stories your grandmother used to tell you to frighten young children?
M1. You stand before a massive stone wall that appears to have no visible openings or other crevices that might indicate how to open it. Instead, six hollow square depressions are lined up along the lower end, right at about the level of your waist. It appears that you will need to insert something of similar size into these depressions, likely in a particular order. If you are ready to try doing just that, turn to V2, keeping in mind that you are standing on a wide wooden grill whose seemingly endless bottom is not visible from above. If you are not ready to meddle with the stone wall depressions, you may walk away and continue exploring this level.
M2. As you pass through what appears to be an empty corridor toward the far wall and into some tiny side chamber to the right, a massive horned beast charges out from a hidden alcove on your left and slams into the solid mass of rock on your right. You have narrowly missed being impaled on the wall and bleeding to death. As the beast pulls its horn out of the wall and turns to face you, you realize you have seen this monstrosity before, painted crudely onto rock canvases of the cave. It is so much more terrifying and real in person. You might now fight the HUNGRY RHINOCEROS (25 VITALITY, 9 AGILITY, 2d6+4 DAMAGE). Once the Hungry Rhinoceros’ vitality is reduced below 10, it only inflicts 1d6+4 damage.
M3. You approach the end of a dark and dank corridor and see the following image etched directly into the original volcanic rock surface of the wall:

It would probably be a good idea to study this carefully and make some notes.
M5. A red sign painted onto the rock wall freezes you in your tracks: it is a twelve-legged spider, the Addercore! You reach your hand behind your shoulders and set your fingers gently on the back of your neck, where the exact same image is seared into your skin forever. As if in response, the painting on the wall turns a brighter red and seems to throb. If oblong skulls are the sign of the Mantika, then the Addercore is the symbol of your people. What is it doing here?

M6. With your final blow, the powerful Mosaic Warrior shatters into a hundred pieces of jagged precious stones and litters the floor throughout the passageway. As you pick your way gingerly through these sharp rocks, you come to a sudden dead end. The light of your torch reveals a very strange painting on the surface of the wall:

Looking at this mysterious image, it occurs to you that you’ve seen those six dots on the left before in exactly the same arrangement somewhere in a wall painting before. But what was the animal depicted to the left of the six dots? Since this particular painting shows only the dots and the tail of the animal, but not the animal itself, it seems that you will need to supply the remaining shape of the animal that tails belongs to on the left. A few clumps of handheld charcoal lying on the ground at your feet seem to confirm this deduction. If you would like to draw a stag, turn to H6. If you would like to draw a rhinoceros, turn to Q9. If you would like to draw a puma, turn to B7. You may consult your memory and notes but cannot flip to different STORYLINE entries.
M8. In a sight that would be likely to make most onlookers laugh out loud—if there were any such onlookers—you crouch awkwardly and wrap your lips around the dripping stone fangs of the sculptures. Fortunately for you, the goo is warm, sticky, and sweet, and immediately sends a flush of pleasing warmth throughout your body. RESTORE YOUR VITALITY TO ITS MAXIMUM LEVEL. You must wait 10 turns before you can lick this restorative drool again. You may now return to C4 and finish reading the STORYLINE entry.
M9. You enter a claustrophobic alcove whose rock surfaces are draped with ancient iridescent algae. But it is the swirling ethereal stew of bluish-green phantom faces and ghostly shrieks in the center of the alcove that really grab your attention. As you stand there mesmerized by the ghoulish faces and serpentine tails flying around in circles, you start to hear a ghastly whisper seep into your mind: “Come join us!” If you wish to step into this ghastly spectral stew, turn to J8. If the very idea makes your stomach churn and you would rather turn around and never look back, you may do so. The grotesque spirits hiss and bray at you, but they do not inhibit your cowardly departure.
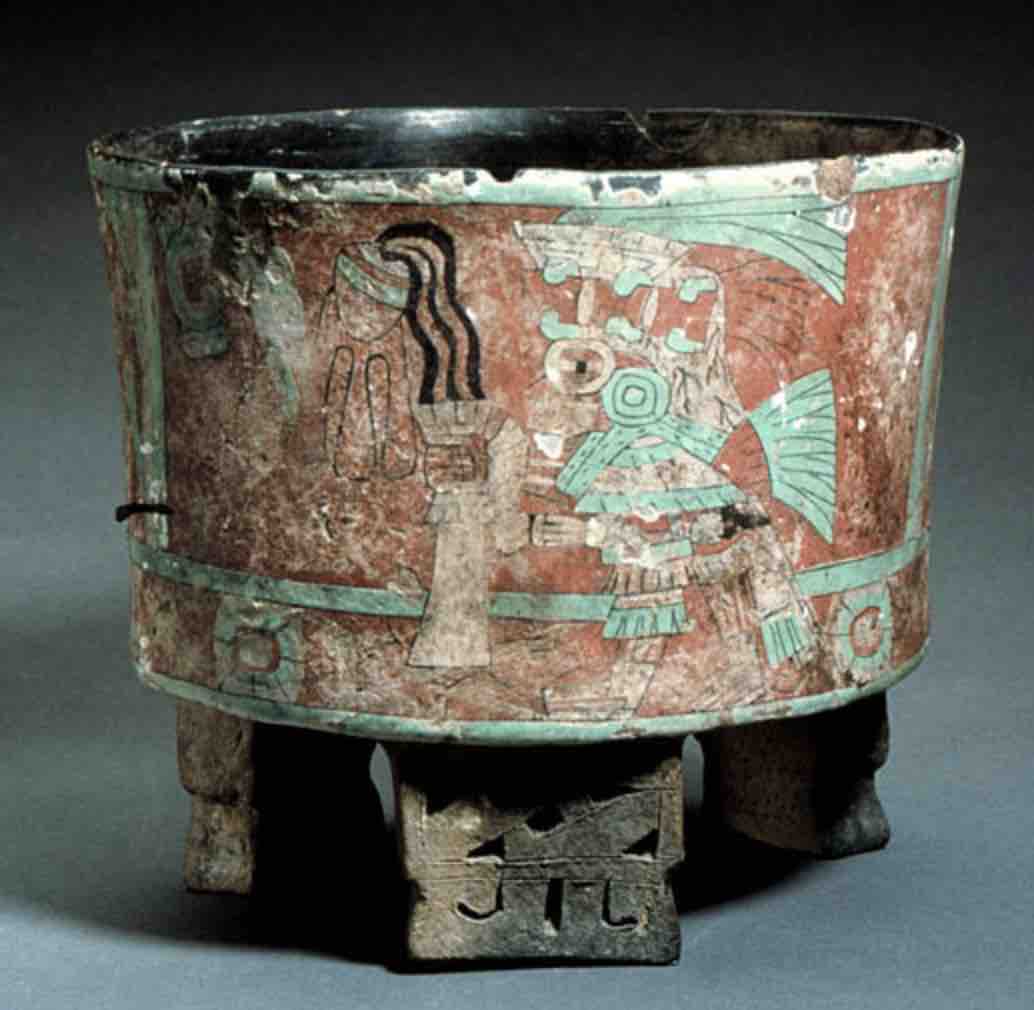
N1. You step into a dark alcove and raise your torch toward the wall. There you find an elaborate red-and-white mural of Tlaloc, the mighty Storm God. There he appears in all his terrible glory, with protruding fangs, goggled eyes, an elaborate headdress, and a lightning bolt in his hand.
N3. In a dark corner of this chamber you find one conch shell nestled alongside the spine of an incomplete human skeleton and an ayahuasca plant (RESTORES 2d6 VITALITY, one use only) growing out of its ribcage. You may take both if you desire.
N5. Spread out across a wide flat wall of the cave chamber is an enormous drawing of a majestic horned beast of some sort. Or does it depict many such beasts? A hint of inexplicable familiarity stirs in your mind.

N6. Fused onto the rock surface of the wall are three symbols composed of precious stone mosaics. Since they are raised slightly from the rock surface on which they are mounted, you touch one of them gently and are startled to see the precious stones light up. It is accompanied by an echo of a ghostly, monotone voice: “Shin!” The sound reverberates throughout the chamber, though the word means nothing to you. You then proceed to touch the other two mosaic symbols and different nonsensical sounds bellow out of the darkness. It might be a good idea to study these three symbols and their associated pronunciations carefully:
O1. Standing off to one side of the main corridor is an angry man whose body ripples with muscles and whose head is adorned in a headdress of feathers. Alarmed, you watch as the man’s visibly shaking chest is ripped open by his own two hands to expose the bloody ribcage and beating heart beneath. Then he throws back his head and lets out a feral scream. Your own heart pumps madly in response as he begins to walk toward you with an evil sneer on his face. While striding in your direction, he uses one of his hands to grip a bone on his own ribcage and cracks off a section to use as a dagger. You must fight OPEN-CHEST WARRIOR (35 VITALITY, 10 AGILITY, 2d6+4 DAMAGE). If you win, you may take a bite out of his fast ebbing heart to RESTORE 2d6 VITALITY.
O3. You press on the sequence of five mosaic signs and feel your heart sink as all fifteen of them go dark in an instant and the sculpture of Mictlantecuhtli groans out loud. Your torch light is snuffed out and a fierce gale of wind swirls around you. In a flash, you are flung out roughly into a familiar looking chamber filled with fallen boulders. DEDUCT -10 VITALITY POINTS. You have been teleported back to the grid square marked B2 on your map. You take some solace in the fact that your torch has suddenly flared back to life—at least that’s something. In making your way back through this cave again, you will skip all STORYLINE entries except for any restorative mineral drips that may have been replenished. You will still encounter random enemies.
O5. Like a felled tree, the trunkish rope creaks and groans for several moments before the final cord is sliced away and the rope is severed. Another large crash of the cistern doors is followed by more splashing of waves. You may now venture down below K6 and toward A2, D6, and J3. No random enemies will be encountered in the drained cistern.
O7. As you approach the center of the pyramid and the two diagonal walls close in to merge with one another at the massive central pillar, you hear a slew of sudden whisk and snapping sounds and are upended on your back and into a wooden cage that swiftly raises you to the high ceiling. You have been caught in a wild animal trap. Attempt to perform a “Smack” kendama maneuver (#4) to cut the rope that is lifting the trap up. If successful on one of two attempts, then you successfully cut the rope and fall back to the ground with only minor wounds. DEDUCT 2 VITALITY POINTS. If you failed to cut the ropes, roll 1d6 to determine your fate. If you rolled 1, 3, or 6, turn to S6. If you rolled 2, 4, or 5, turn to J6.
O9. Lying on the ground amidst a pile of jumbled up warrior skeletons are two jawbones and two conch shells, all of which you may take.
P1. You fix the last of the greenstone tablets into the remaining hollow depression in the wall and wait for something to happen. Unfortunately, that something is the wooden grill beneath your feet opening up and disappearing, plunging you into a head-over-heels fall fifty feet into the abyss. Your fall is cushioned by a leathery pillow of some sort. As your eyes adjust to the daylight far above from where you fell, you realize that you are lying on the oversize scaled body of a monstrous boa constrictor of some sort. As you grope around for your weapon, you feel a sharp pain in your neck and collapse in a heap back into the serpent’s scales. The world grows dark and it is only a matter of moments before you are swallowed whole.
P2. A glint of light in the corner of your eye draws your attention to a modest dripping of drool from the sculptured stone fang of one of the feathered serpents affixed to the façade of the pyramid. You may lick what little drool there is to RESTORE 15 VITALITY POINTS.
P4. You wipe the blood of the Jawbone Necklace Warrior from your weapon and take a deep breath to compose yourself. You may take two jawbones from his necklace. In addition, nestled into a stone block in the ground is a square greenstone chiseled in such a way as to reveal the following symbol:

If you won this battle while sparing the life of the Mantika hostage, turn to U5. If she died during the battle, you mutter your regrets for her untimely demise and continue on your way.
P7. As you pass through a narrow gap between the diagonal wall on your right and the outer wall of the crypt, your eyes are drawn to a singular mural painted on top of a layer of red plaster slathered onto the stone brick wall. The mural is in great condition and does not appear to be all that old, with fresh colors. It seems to depict some sort of a fowl breathing fire out of its mouth. Interesting!

P8. You step on what initially feels like a small rock, but instead of twisting your ankle it disappears into the ground with a “click” sound. Before you have time to think about what such a sound might mean, you find a blowgun dart sticking out of your right arm. It must have been triggered by a trap mechanism of some sort. DEDUCT -5 VITALITY POINTS.
P9. Attached to the corner of the ceiling is a pulley mechanism connected to a taut set of ten separate ropes. These will be harder to cut than the others. To do so, you must successfully perform the DISEMBOWEL kendama maneuver (#13). After five unsuccessful attempts, you must fight a MASKED WARRIOR (30 VITALITY, 9 AGILITY, 2d6+3 DAMAGE) who hears the sounds of your fruitless grunting and comes to investigate. If this is the second set of ropes you have cut for this cistern, turn to S4. If it is only the first, the cistern still holds.
Q3. Lying on the ground next to two massive boulders is a by now distressingly familiar sight: the skeleton of a warrior. This particular one still has a necklace laced with 6 jawbones:
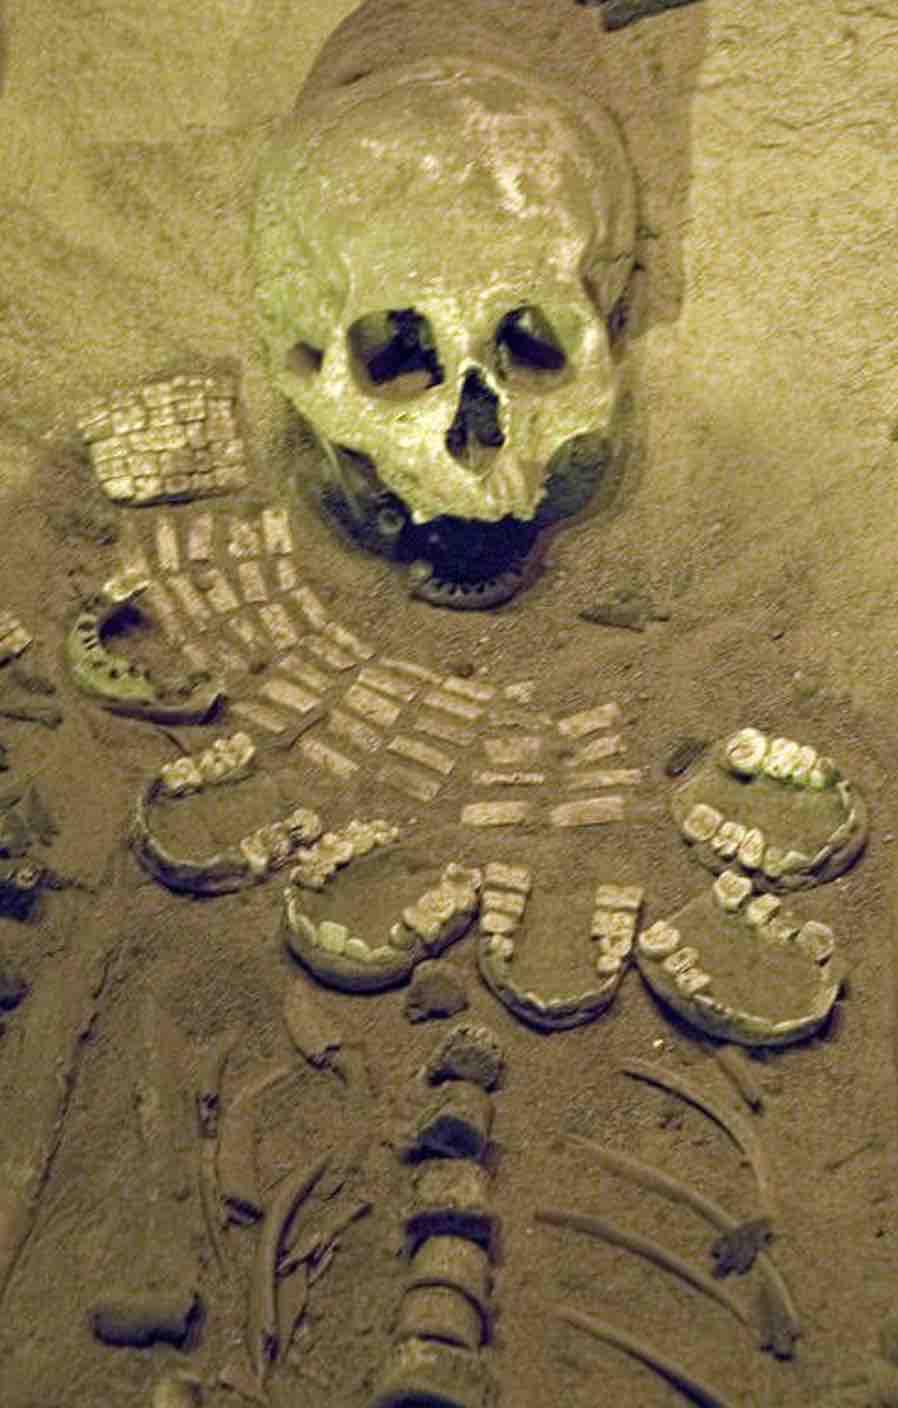
On the back of the skull you can make out the the painful impressions of the Addercore sign that is also tattooed onto your neck. This means that this warrior was one of your own ancestors. But this is one level below the destruction of your people by the High Priest and his unholy ally Huehueteotl, and you haven’t found any other signs of a dead Teotihuacano warriors. So who was your ancestor fighting in a death match? Regardless, you may take the jawbones if you wish.
Q4. Coated in steaming blood from that oversize horned pig, you stomp around the corner of the alcove and immediately drop to your knees in gratitude. For there, lying propped up against the corner of the wall, is the Medallion of Mictlantecuhtli, the hostage god of Teotihuacan whom your own ancestors once prayed to so fervently. To you and your kin, he is the God of Life, not the God of Death as they now say above ground. Though you have never seen this medallion before, you pick it up like a long-lost cherished possession and feel a warmth course through your body. INCREASE YOUR MAXIMUM VITALITY BY +10 POINTS. In addition, you will now get two attempts in every round of combat to perform Tier 1, 2, 3, and 4 kendama maneuvers (#1-13) during battle.
Q5. Much to your relief, you find a POTENT AYAHUASCA PLANT (RESTORE 2d6+3 VITALITY) growing out a crack in the floor.
Q6. On the ground of a dark corner you discover a shallow pool of iridescent water encircled by bricks decorated with precious stones. This is a rejuvenative mineral spring, but it is so shallow that you can only scoop a couple of handfuls into your parched mouth before you start scraping mud. Restore up to 15 VITALITY POINTS. You may return to this location later to restore an additional 15 VITALITY POINTS, but must wait at least 10 turns to allow the shallow spring time to replenish its healing waters.
Q7. After ascending steeply for the first fifty steps or so, you now come to an intersection just above the base of the pyramid that branches off in two directions on either side of you. The rest of your ascent up the pyramid will be much more gradual as it winds its way slowly around the perimeter. You notice that the walls of the pyramid are now faced in an elaborately decorated façade bearing two types of heads: a crocodile and a feathered serpent.

From this point forward, you will resume your Random Enemy rolls of 1d6 in accordance with the enemy horrors listed for Level 6.
Q8. You take a deep breath and hand your obsidian dagger over to Pitlac, all the while preparing yourself for the possibility of an quick slash to the throat. Much to your surprise, however, Pitlac then does exactly what he said he was going to do: gives you a clear demonstration of how to be more effective in combat. From this point forward, you can now attempt the kendama maneuvers “Jab,” “Stab,” “Slice,” and “Smack” (#1-4) two times in each round of combat. If you succeed in either attempt, you have succeeded in hitting your opponent. However, you can still only hit your opponent once in a single round of combat—the only difference is you can now attempt a second try with the kendama if your first attempt fails. Be sure to mark this improvement in your kendama skills on your CHARACTER SHEET.
Q9. You draw a crude rhinoceros to the left of the tail with six dots, taking care to connect the tail with its rear end.

Then you wait. Without warning, the wall with the enigmatic painting bursts come to life and the stick figure with a bird-shaped head begins to wave its bird-head staff vigorously in your direction. The hoofed beast, which appears to have its entrails hanging out, stamps its feet, snorts its nose, and charges toward you right out of the wall as the bird-head man leaps onto its back and rides it like a horse. A mere second from impact, with your arms shielding your head, the entire scene dissipates into a fine mist and drifts toward the ground. As you recover your senses, the wall in front of you crumbles away to reveal a dark passage going forward. Since no harm has come to you, it appears that you drew the correct beast! You may now proceed onward toward the grid squares marked X9.
R2. After working your way through a long, winding passage, you find a taut series of ropes stretching from a stone handle in the corner of the floor up into the dark ceiling to an unseen point beyond. This must be the rope that holds the doors of the cistern in place and prevents the water from being dispersed throughout the floor. You push and pull on the rope and find that it is very tough and unyielding. You will have to perform the DISFIGURE kendama maneuver (#12) in order to cut the rope in two. After five unsuccessful attempts, you must fight a JAWBONE NECKLACE WARRIOR (27 VITALITY, 8 AGILITY, 2d6+2 DAMAGE) who hears your frustrated grunts and comes to investigate. If you succeed in cutting the rope in two and this is the second time you have done so on this floor, turn to C6.
R4. At the dark end of a narrow side corridor, you lift up your torch to bring the wall into focus and are surprised to find the terrified face of a fellow escapee who has been fed to Huehueteotl. She is crouching down in the corner with her hands around her knees and head between her legs, hoping against hope to evade detection. Her torch is out. As you crouch down to get a better look at her, she realizes she has been discovered and jumps up with frighteningly quick reflexes, pointing an obsidian dagger at you. Her face is that of a wounded and cornered animal, and her body is covered in fresh gashes and old scars. Around her heaving chest hangs a necklace adorned with one human jawbone and one conch shell, placed around her neck as part of the sacrificial ritual she was intended for. “You’re going to tell them where I am, I know it!” she growls out in anger. Then, without warning, she leaps at you and slams your body into the stone wall. Deduct 2 VITALITY POINTS. When you manage to get up on your feet again, you discover that she has positioned herself between you and the corridor exit, determined not to allow you to escape. Fortunately, now that you can get a better look at her, it is clear that she has already been mortally wounded and is bleeding profusely from nearly every limb of her body. You must fight this MORTALLY WOUNDED ESCAPEE (6 VITALITY, 6 AGILITY, 1d6 DAMAGE). If you win, turn to Z2.
R6. You press on the sequence of five mosaic signs and are feel your spirits rise as all fifteen light up in unison and a deep “Ahhhhhhh” sound is released from the mouth of the sculpture of Mictlantecuhtli. You watch transfixed as the round stone sculpture crumbles into dust, leaving behind a gaping hole for you to climb through. You have correctly spelled the name of the God of Life! You may now crawl through the opening in the wall and proceed to C2.
R7. The cave shakes like an earthquake as Lionman’s corpse collapses onto the ground. You look around for Pitlac to celebrate, but hear only a faint moan. Your heart sinks as you see only his head and shoulders peeking out from under Lionman’s massive body—he has been crushed. You rush over to Pitlac’s side and cup his cheeks in your bloody hands. “We did it,” he wheezes through bloody teeth. “Kill the High Priest. Burn this city down.” And then the light fades from his eyes and you are alone once more.
R8. You grab hold of his obsidian dagger, steel your resolve, and slice his throat with a single lusty effort. As you do so, the man’s body transforms into an ethereal mist and swirls around your body, entering through every orifice you have and lifting you off the ground. After being suspended in the air for a few moments, you collapse to the ground and immediately begin weeping out loud. So much death and destruction, one clan killing another, one civilization after another buried by the fiery wrath of the fickle gods. Is there any point to it all? Better to end it right here and now, you think to yourself, rather than prolong the suffering. You pick up the obsidian dagger again and slit your own throat. But instead of a spray of red mist on the cave wall, you feel a renewed resolve well up inside of you. You gently press your other hand to your throat and, much to your relief, find that it is fully intact. DEDUCT -15 VITALITY POINTS (if you have 15 or fewer to begin with, reduce your Vitality Points to 1). You have now gained the ability to cast the COWARD’S BANE SPELL.
R9. As you approach the end of a curling corridor, a mysterious gust of wind snuffs out your torch and a swirl of reddish lights engulfs you. The lights then coalesce into a sight for sore eyes: your great-grandmother, who was burned alive in the Teotihuacano sack of your village. Reduced to tears and wonder, you can only watch dumbly as the vision begins to speak to you somewhere in the recesses of your mind. “You are the last of my blood. Honor my death by taking revenge on he who made an unholy pact with the Old Fire God! Find the wall painting that depicts the High Priest wielding his bird staff—and desecrate it as he desecrated us! For that was the painting that commemorated his deal with Huehueteotl.”
S1. Climbing over the massive furry corpse of Lionman to reach a side corridor, you find yet another collection of mosaic signs fused onto a rock wall. By now you know the drill and touch each one to hear its pronunciation bellowed out in the dark hall by an anonymous voice:

S2. You approach what appears to be a side opening from the main corridor and are startled to find a man standing with his back to you. As he turns around to face you, you are even more startled to find that you recognize his face: Pitlac! So he’s still alive. He says the same thing to you. “Did you see that awful room with the piles and piles of skeletons? Those were my ancestors.” Alarmed, you suddenly notice that he, too, has an oblong skull. Danger makes strange bedfellows, doesn’t it? But there is no time for ancient grudges down here. If you have an obsidian-tipped spear, Pitlac kindly offers to teach you how to use it more effectively: you may now make two attempts to perform a single STUN, BRUISE, OR PUNISH kendama maneuver (#5-7) during each round of combat. You and Pitlac continue discussing the history of your peoples, who were once mortal enemies with each other. Apparently this place marks the last stand of the Mantika people—at least those who were willing to fight back before submitting to the Teotihuacanos. For their efforts, the last of the resistance was burned to a crisp with Exploding Maize. “I didn’t know what those were,” Pitlac explains, “so I didn’t touch them.” He tells you that you already made a preliminary foray into the section of the cave up ahead, but it appears to be really confusing with all kinds of curling side passages. He wishes you the best of luck and disappears into the darkness.
S3. You hand over two of the four items demanded by the Keeper of the Beasts and he smiles. “Very good,” he says. “It’s much easier for me to get these from you now than try to pick them from your corpse in a few hours.” He then teaches you what he says is a method for taming and controlling a wild puma: when you encounter the Escaped Puma, attempt to perform a “Bruise” kendama maneuver (#6) before the first round of combat begins. If you succeed in pulling it off in one try, the Escaped Puma will submit to your control and accompany you in your wanderings and battles until it is killed, absorbing all enemy damage meant for you. Though you still don’t know if you can trust this strange Keeper of the Beasts, the fact that he didn’t sick his animals on you at the outset suggests that he is telling the truth. You thank him for his advice and back cautiously out of the chamber.
S4. With a sharp snap and a crisp twang, the ropes sever in two and the upper halves fly off into the ceiling. You again hear the by now familiar but always satisfying sounds of groaning stone doors relieved of their watery burden and splashing waves spilling throughout the nearby corridors. You may now venture past W5 down toward K6. You will not encounter any random enemies in the drained cistern.
S5. You lift the sphere of ice out of the tripod and gaze into its solid core. As you are trying to see if anything is embedded into the center of the ice, your hands suddenly plunge into the sphere as if it were jelly. Before you can pull them out, the sphere refreezes with your hands trapped inside. Then a cold surge of icy energy courses through the veins in your arm, rising up to your head. You feel a sharp freeze in your brain—and then the sensation wears away just as fast as it came. DEDUCT -10 VITALITY POINTS. However, you have also gained the ability to cast the MINDCHILL SPELL.
S6. You frantically pull on the bars of the cage and snap two of them apart just in time to slide out and tumble to the ground without too grievous of an impact. DEDUCT 4 VITALITY POINTS.
S8. At the end of a short dark corridor, you see a crude yet somehow majestic drawing on the bare rock wall, which is deliberately framed by an opening in the stone facing:
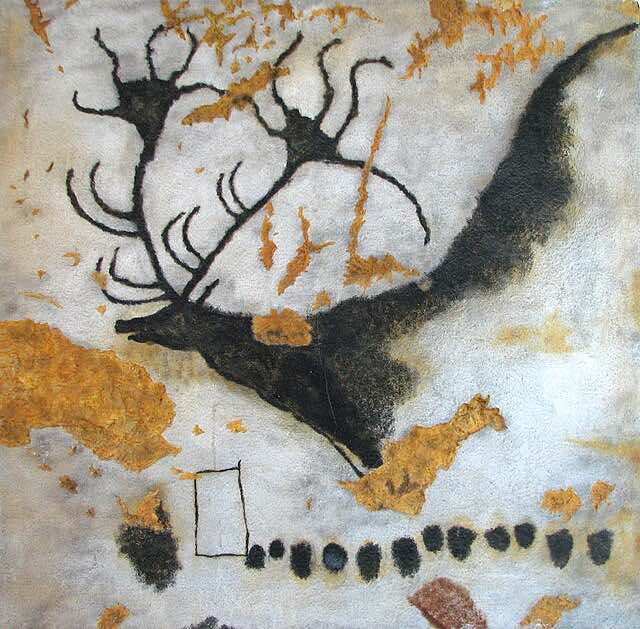
It appears to be an enormous deer of some sort, with a powerful web of antlers rising proudly from its head. You have never seen such a magnificent beast before. Gazing at the drawing, you sense some sort of strange and unwelcoming energy in his narrow alcove. You feel the hairs on your neck rise involuntarily as your mind begins to imagine such an impressive animal walking gracefully over the face of the earth. Did such a giant deer ever exist, or is this drawing merely the product of someone’s overly productive imagination? Regardless, since the drawing was deliberately framed by the stone facing for viewing in this alcove, someone must have regarded it as important. You might want to study this drawing closely and make some notes, as you will not be permitted to consult this entry again later unless you walk all the way back to this site.
T1. Nestled into a side alcove is yet another oversized Olmec head with an enigmatic symbol impressed into the soft clay surface of the wall above it.

As you squint your eyes and try to make it out from a distance, the head suddenly opens its mouth: “Look carefully.” Then it shuts it mouth again and reverts to an ornately chiseled block of rock. You may make notes describing what you see, but you may not copy it exactly. If the Olmec head sees you doing so, it will suck you toward its mouth and smash your body into its nose, resulting in a LOSS OF -10 VITALITY. So don’t do it!
T2. At the entrance to a long and dark corridor you find a familiar sight: a stone sculpture of Huehueteotl, the Old Fire God. Though he always sports a miserable grimace and cruelly bent back, this particular version seems even more bitter and resentful than usual. As you approach the statue, a swirling mist of red, orange, and yellow flames rises up out of the vessel born on the Old Fire God’s back. Within seconds it takes the shape of an elderly flesh-and-blood man with a hunched back and nasty scowl. He strides angrily toward you, handicapped only by a noticeable limp in his left left. Chained to his other leg is a polished greenstone ball the size of your head, with little indentations carved out across the otherwise smooth surface. As you consider the likely impact of such a blow via a direct bodily hit, you notice that even the chain and manacle that shackle the killing ball to his leg are made of greenstone. Without saying a word, the old man bares his rotting teeth and calls upon unseen reserves of strength to swing the ball over his head. As he does so, the friction of his swing causes the corridor to heat up rapidly. You feel like you are trapped inside a furnace, with prickly heat pushing up against your skin from the inside, desperate to be released. The pressure is nearly intolerable, and you feel as if your skin will soon melt away from your body. If you have the codeword “Tikal,” turn to V6. If not, turn to H8.
T3. You reach the end of the walled corridor to find one of your old nemeses waiting for you: the Open-Chest Warrior. Of course, he hasn’t torn his chest apart yet, but you recognize that crazy look in his eyes and telltale flexing of his ripped arms just prior to the act. Then, sure enough, he rips his chest open and breaks off not one but two ribs for combat. You will never get used to the sight of a beating heart behind a rib cage, just below a maniacal smile. You must fight OPEN-CHEST WARRIOR (30 VITALITY, 10 AGILITY, 2d6+4 DAMAGE). If you win, you may take two jawbones hanging from his necklace and turn to Z7.
T4. In the middle of a wide corridor with high ceilings filled with mineral-encrusted stalagmites and stalactites you see a by now familiar—and most welcome—face. Pitlac! He seems glad to see you, too. “So this is how it all ended,” he says with a philosophical look in his eyes. “The High Priest made a pact with the Old Fire God to destroy our peoples with a volcanic eruption. We were too busy fighting each other to see what was going on. Then the last survivors of our clans were hunted down in this ruined palace. Apparently, the most merciful death was to be blown apart by Exploding Maize—now that’s saying something.” You smile at this sour joke and notice a change in Pitlac’s face. Then you realize: he sees your false jade tooth. He takes one step to your side and looks at the Addercore on your neck. “I’m sorry,” he says. “I thought we might be able to work together—a stirring tale of the last two surviving members of two warring clans uniting to overthrow the High Priest. But I just can’t do it. A man with an Addercore tattoo on his chest killed my father, when we should have been killing the Teotihuacanos instead. I wish you all the best, but … I can’t help you anymore. Good luck—and watch out for the traps on either side of us.” And with that, Pitlac slinks off into the shadows once more.
T5. The moment you cleave the trainer’s skull in two, you hear a shrill squawk from the Golden Hawk. Moments later, you feel its razor-sharp talons dig into both of your shoulders and go stiff with the realization that it is perched around your neck. But it does not seem to have any interest in hurting you now that its trainer is dead. Add up the total number of damage points that you managed to deduct from the Golden Hawk’s attacks on you during the last battle as a result of your kendama defense maneuvers. If you deflected less than half of its total attack damage, the bird pushes its weight into your shoulders, digs its claws into your flesh for leverage, and flies off into the horizon. DEDUCT -5 VITALITY POINTS. If, however, you deflected more than half of its total attack damage during the fight, the Golden Hawk jumps lightly off your shoulder onto the ground, picks up the trainer’s leather harness, and lays it your feet. It appears you have won its respect and it is now willing to fight on your behalf. You have acquired a GOLDEN HAWK (30 VITALITY, 9 AGILITY, 2d6+4 DAMAGE). In future battles, the Golden Hawk will fight on your behalf from a safe distance and absorb all damage intended for you until it is killed. Regardless of whether or not you acquired the Golden Hawk, if you killed its trainer turn now to Z1.
T7. As you make your way through the winding corridor, stepping gingerly between sharp stalactites and stalagmites, you suddenly see a movement of dark shadows up ahead at the end of the passageway. You halt your footsteps and hold out your torch to shed some light on what lies ahead. Before long, a figure emerges that seems like it could only exist in a fevered dream. It is of humanoid shape and form, but composed of a mosaic of different precious stones that have been fused together. As a handheld figurine, it might be attractive. But this is a life size incarnation stomping eagerly in your direction, flinging its cobblestone arms out to the sides to smash the cave walls as it walks. Each time it does so, it throws a handful of stone detritus at you. These projectiles of gravel and dust do you no harm other than revealing the monster’s superhuman strength and sinking your spirits. You must fight MOSAIC WARRIOR (30 VITALITY, 9 AGILITY, 2d6+5 DAMAGE).

U1. You gently pick up the T-Shaped Headdress Priest’s greenstone statue and it immediately begins to radiate light outward through every crack and crevice. A voice speaks vindictively in your mind. “I may be small and wounded, but I can still bring pain to those who underestimate me!” You then hear the sound of both male and female chuckling behind you and turn around with fear. You see before you not one opponent, but two. You must fight both a T-SHAPED HEADDRESS PRIEST (20 VITALITY) and an OPEN-CHEST FEMALE WARRIOR (35 VITALITY, 10 AGILITY, 2d6+4 DAMAGE) at the same time. The T-Shaped Headdress Priest attacks by attempting to cast the INFERNO SPELL (2d6 DAMAGE). You must complete a Rock, Paper, Scissors test on your enemy’s behalf each round of combat to see whether or not he is successful in casting the spell. You cannot mitigate the damage of this spell with your weapon; instead, your only option is to cast a successful MINDCHILL SPELL in defense. You can, however, attack the T-Shaped Headdress Priest with your melee weapon when it is your turn in combat.
U2. You gently pick up the Open-Chest Warrior’s greenstone statue and it immediately begins to radiate light outward through every crack and crevice. A woman’s voice speaks soothingly in your mind. “You are braver than you look. But are you brave enough to kill a woman in cold blood?” You hear the startling sound of full-throated feminine laughter behind you. You turn around and see a muscled, half-naked woman with a deranged look in her eyes tear open her bare chest to reveal a blood-soaked ribcage and pulsing heart beneath. She then uses both of her hands to crack not one but two jagged ribs off to use as weapons. You must fight OPEN-CHESTED FEMALE WARRIOR (30 VITALITY, 9 AGILITY, 3d6 DAMAGE).
U3. Hanging down from the ceiling high above you is a massive stalactite with a steady trickle of rich mineral water dripping off its tip onto a stalagmite rising up to meet it from the floor below. You may lick off all the rich mineral water on both the stalactite and stalagmite to RESTORE 20 VITALITY POINTS. The rich mineral water will not be replenished for further rejuvenation until you have taken 10 turns.
U4. You were beginning to think it impossible, but after absorbing an unimaginable number of blows the Self-Flagellating Priest finally embraces his mortality and collapses to the ground, never to punish his own body again. In the far corner you find a small wooden box, inside of which is the following symbol etched into a square greenstone block:

U5. The Mantika woman lies on the ground clutching her throat, which you can now see is heavily bruised and lacerated from her captivity and the violence of the battle. But it is the gaping wound on her side that most clearly spells her doom—the Jawbone Necklace Warrior must have plunged his dagger into her midriff just before he fell to his own doom. As the life spills out of this pitiable captive, you kneel down and lean in to hear her whisper something. “Thank you, child of the Addercore. Death is fated for all us Mantika. But you may still fight for your clan. Please, hold my wrist as I die.” You do just that, and a burst of vigor courses through your own bloodstream. INCREASE YOUR MAXIMUM VITALITY BY 10 POINTS.
U6. As you round the corner of the wall your heart begins to beat faster at the sight of a black puma eyeing you from an elevated perch of volcanic rock. It crouches down with its rear end in the air as if it about to pounce, all while emitting a menacing purr that quickly rises to a crescendo. If you paid the Keeper of the Beasts for his advice, turn to I4. If not, you must fight the ESCAPED PUMA (20 VITALITY, 8 AGILITY, 1d6+4 DAMAGE). If you win, you may take the flayed skin of a deadly animal.
U9. Fused onto the surface of the center rear boulder of a makeshift alcove formed from fallen rocks you find three symbols composed of precious stone mosaics. Since they are raised slightly from the rock surface on which they are mounted, you touch one of them gently and are startled to see the precious stones light up. It is accompanied by an echo of a ghostly, monotone voice: “Tay!” The sound reverberates throughout the chamber, though the word means nothing to you. You then proceed to touch the other two mosaic symbols and different nonsensical sounds bellow out of the darkness. It might be a good idea to study these three symbols and their associated pronunciations carefully:

V1. In a small side alcove bathed in a stream of sunlight from a grill many tens of feet above your head visible through a narrow shaft, you find yet another large stone Olmec head staring impassively back at you. This time, however, the head is accompanied by curious markings on the wall above him. As you squint your eyes and try to study the signs from a distance, the head suddenly opens its mouth: “Look carefully.” Then it shuts it mouth again and reverts to an ornately chiseled block of rock. You may make notes describing what you see, but you may not copy it exactly. If the Olmec head sees you doing so, it will suck you toward its mouth and smash your body into its nose, resulting in a LOSS OF -10 VITALITY. So don’t do it!
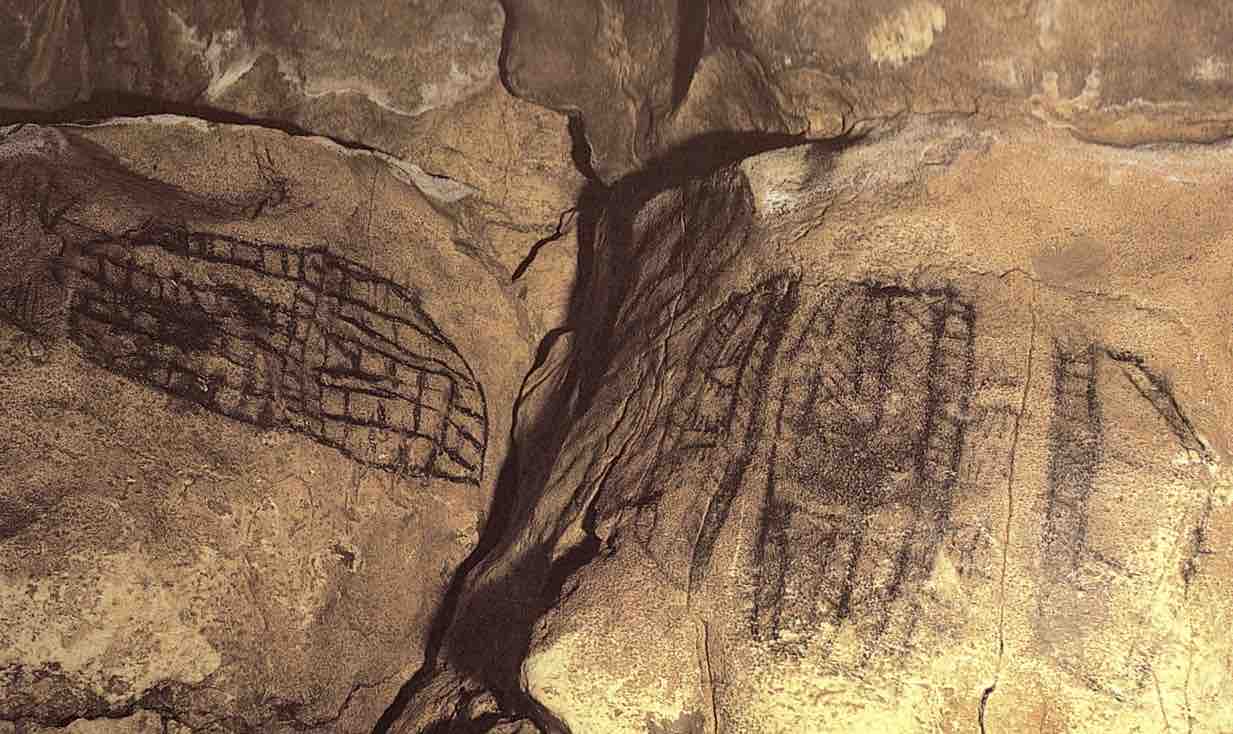
V2. You must insert the six etched greenstone tablets that you found in each high-walled corridor on this level into the six hollow depressions at the bottom of the stone wall. But they cannot be inserted in just any order: they must be lined up in accordance with the position of the letter in the alphabet that appears on the grid square in which they were found, from A to Z. You may consult your memory and notes, but you may not flip back through STORYLINE entries. You may choose from the following options:
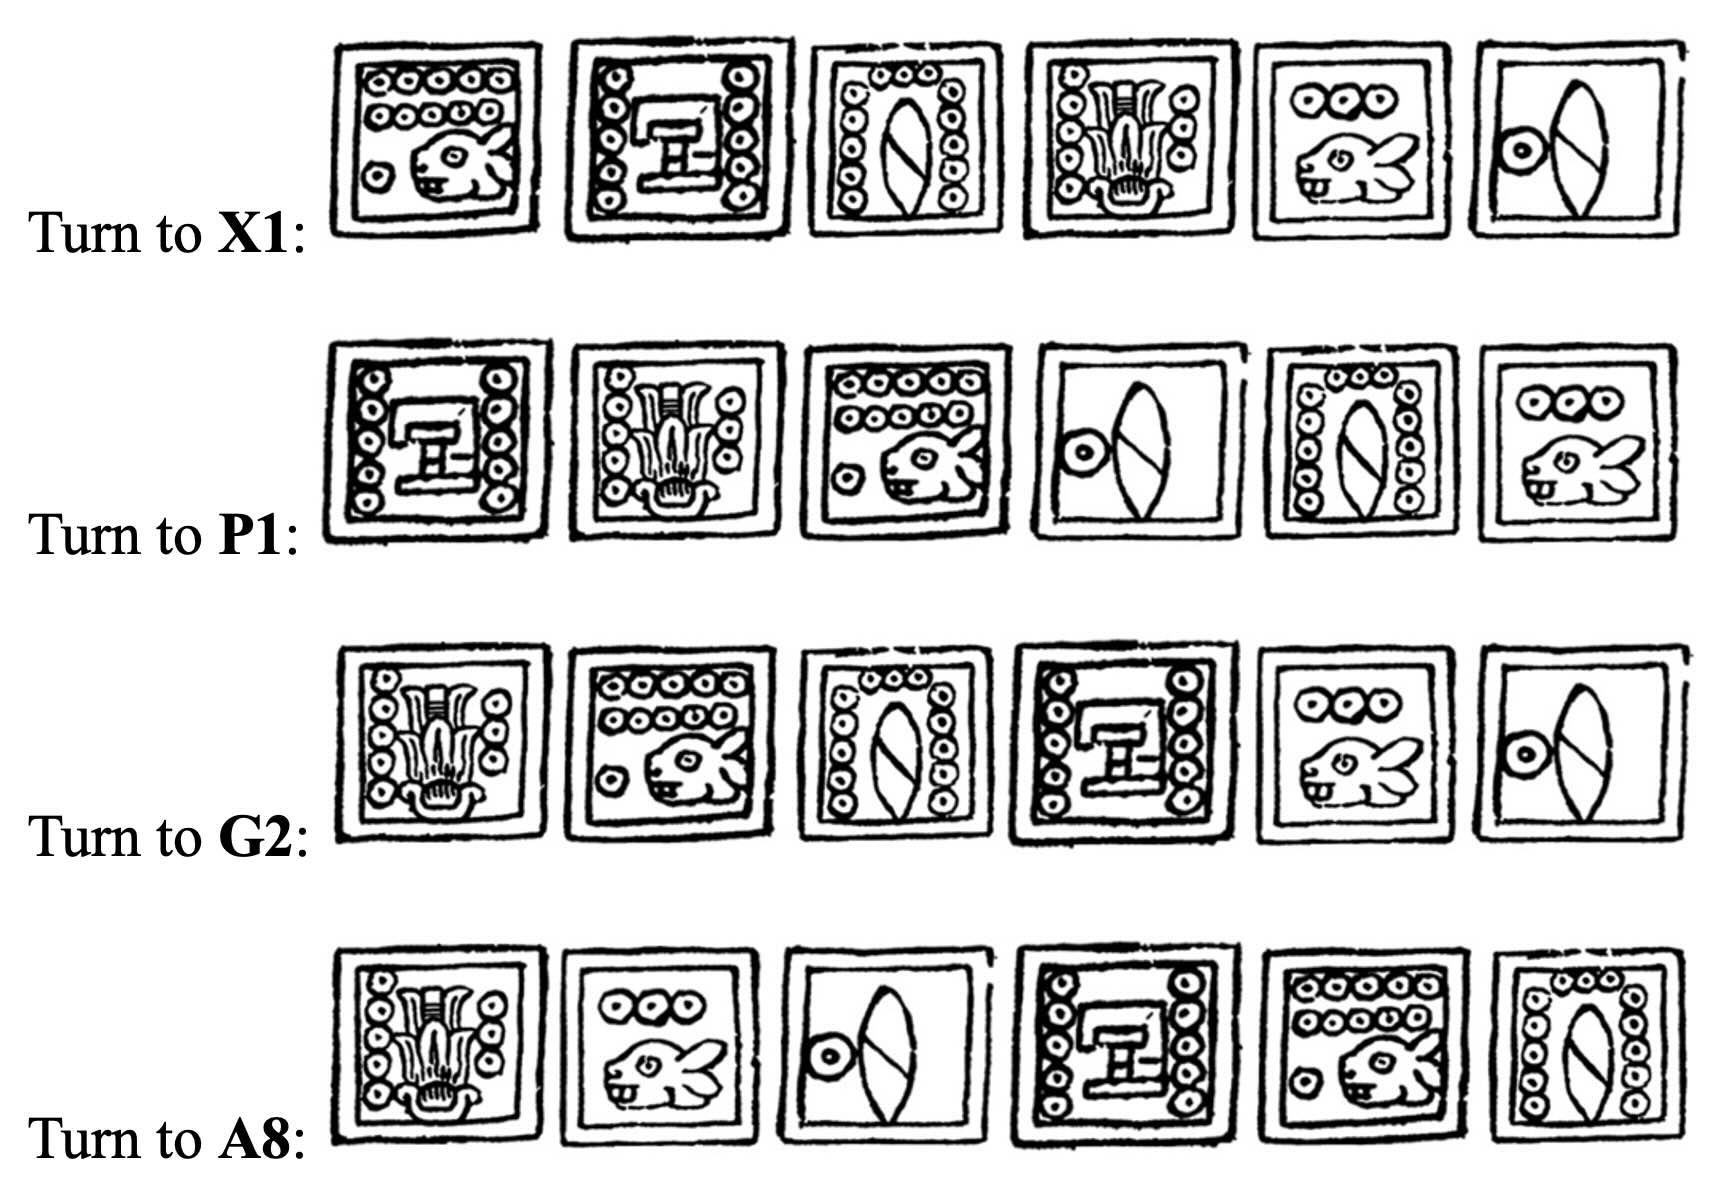
V3. You enter a fairly large chamber strewn with half-eaten carcasses of apparently both human and animal origin. You put down your torch once you realize that several lit torches are already ensconced in altars in the center of the room. The light they give off reveals heart-stopping silhouettes of pumas, jaguars, and wolves lounging around in the corners of the chamber. You stand frozen in place, wondering why none of these wild animals is making any attempt to devour you. Your eye then turns upward as you notice a vivid mural on the wall depicting two wolves eviscerating a deer—not at all a reassuring image!

All of a sudden a loud voice startles you from behind as a man appears from nowhere. “Don’t worry, they won’t hurt you,” he says. You are not the slightest bit reassured, and eye him warily. He is short and fat, adorned in jade accessories and sporting an oily beard and slicked back hair. “At least, they won’t hurt you unless I tell them to. But you’re in luck! Three other sacrificial victims have already made their way here, and the remains of dinnertime lie strewn all about you. So it’s a good thing you’re slow.” You start to inch backwards, wanting nothing more than to get away from this man and his feral beasts. “I’m the Keeper of the Beasts,” he says. “And all live burials for the pyramids go through me. You look … optimistic. So let me give you a tip, since I like to give people a fighting chance—at least, when my children aren’t hungry. There’s an escaped puma somewhere on this floor. I haven’t broken him in yet, and he gave me a nasty scrape before he fled. So if you want him, you can have him—for a price, of course.” He tells you that the price for his advice on how to catch and a control a wild puma is to give him two of the following: one jawbone, one conch shell, one ayahuasca plant, or one flayed skin of a deadly enemy. As if to further encourage you to pay his price, he shines the light of his torch on another wall mural to show you just how long and sharp the claws of a puma are, in case you have forgotten:
If you decide to pay the Keeper of the Beast’s price for his advice, turn to S3. If not, then you thank him for his offer and back cautiously out of the chamber, your eyes fixed warily on the puma mural.
V5. You press on the sequence of five mosaic signs and feel your heart sink as all fifteen of them go dark in an instant and the sculpture of Mictlantecuhtli groans out loud. Your torch light is snuffed out and a fierce gale of wind swirls around you. In a flash, you are flung out roughly into a familiar looking chamber filled with fallen boulders. DEDUCT -10 VITALITY POINTS. You have been teleported back to the grid square marked B2 on your map. You take some solace in the fact that your torch has suddenly flared back to life—at least that’s something. In making your way back through this cave again, you will skip all STORYLINE entries except for any restorative mineral drips that may have been replenished. You will still encounter random enemies.
V6. Just as you feel your skin is about to melt away, you hear a deafening clash of thunder followed by an instant swirl of pelting rain. In your sudden wonder at this change of fortune you can’t even tell where the rain is coming from: it appears to come from every direction at once. Through the storm in the corridor, you can see alarm and confusion form on the Old Fire God’s eternally grim face—and then a hardened resolve. “So she thinks she is the master of me! No more orders will I take from anyone dead or alive. I will crush the bearer of her wrath.” You must fight the OLD FIRE GOD (30 VITALITY, 9 AGILITY, 2d6+2 DAMAGE). You may not cast the INFERNO SPELL during this battle, as it takes place in the middle of a fierce rainstorm.
V7. At the near end of a seemingly endless corridor, you find huddled in a corner the mangled body of a woman. She appears to have been mauled. You wonder how she got here: is it possible that there are still more escapees other than Pitlac who survived the first two levels of this ordeal? Whatever her story, it is about to end here. “I was gored by a terrible beast. Long nose. Two tusks. Shaggy fur. Gods, it was awful! I lost my dagger upstairs somewhere, so all I had was this blowgun—not much use against that monster.” You try to give her some comfort in her last moments and prop her bloody head in the cradle of your arm. You conclude that she must have been right behind you most of the time, benefitting from your trailblazing efforts, then somehow sneaked ahead of you in the dark as you explored one of the side chambers or corridors. She asks you to hold her hand as she dies, and you feel the ebb of her pulse in her wrist. INCREASE YOUR MAXIMUM VITALITY BY +10 POINTS. Then she breathes her last. You may also take her blowgun and 5 blowgun darts if you wish.
V8. You approach the center of the Sun Pyramid where two diagonal walls close in to meet one another at a massive stone pillar. In the middle of the pillar is a hollow cavity that extends about ten feet into the center of the stone until it terminates at a wall of uneven rock. By sticking your torch inside the hollow cavity and squinting your eyes, you can make out a vivid painting of a horned beast you have never seen before. Why is this here, and why did someone chisel a hollow out of the central stone pillar to provide access to it? You don’t have a clue, but it would nonetheless probably be a good idea to study his painting closely and take some notes.

V9. As you try to weave your way through a forest of goo-encrusted stalagmites, you lose your footing and fall headlong into a hanging stalactite that knocks you backward with a cruel blow to the head. DEDUCT -5 VITALITY POINTS.
W1. You climb up out of the pit of dead serpents and pick up the carved greenstone tablet lying on the ground on the other side. It looks like this:

W2. On the left side of a broad and regal corridor, furnished with starkly painted tripods and suspended strings of variegated precious stones, you spot a dark alcove in which the dimly lit shape of a sitting humanoid form greets your eye. Such things always give you pause. But before you can decide whether to advance or retreat, the vaguely human form stands up and walks out into the light with a smile on its face. It belongs to a strapping young man—a fellow escapee like yourself. “I’m Pitlac,” he says in a welcoming voice. “If you’ve made it this far, then you’ve definitely got some grit. But I don’t think you realize what sort of horrors lie ahead. What we’ve seen so far is nothing.” He goes on to tell you about his own background, how he was a warrior in his village captured not in a raid but in an actual battle with the Teotihuacanos. In other words, he has some real skill with a blade—no wonder he is not only alive, but also appears to be completely free of any scrapes or wounds. And he’s even managed to exchange his dagger for an short obsidian-tipped spear. You ask him where he found a spear. “I didn’t find it,” he says. “I was caught in a wild animal trap and broke the bars to escape. Then I realized I could tie my obsidian blade to the cage bars.” Clearly, this man is capable in the martial arts. He offers to teach you how to use your obsidian dagger in a more effective way. But there is a catch—you’ll have to hand it over to him so he can demonstrate. If you agree to give your dagger to Pitlac, turn to Q8. If not, turn to I9.
W4. Along the wall of the chamber is the skeleton of a warrior—but this is no ordinary warrior. He is a warrior from your clan. How do you know? The skull still has embedded within its jaw a false jade tooth, a practice only your clan follows.

Now the evidence is mounting that this cave was not only the site of ancient eruption and slaughter of your Mantika rivals, but also your own clan. Feelings of sadness mix with rage in your breast. Though the jawbone of this warrior is intact, you would never think of removing it from one of your own ancestors. However, lying within the skeleton is also a crushed blowgun and 5 usable darts. The blowgun is unusable, but you can take the darts if you’d like. Before you push onward, you note with grim satisfaction that two other warrior skeletons—neither sporting oblong skulls nor false jade teeth—lie mangled nearby. At least your ancestor killed twice his number in vile Teotihuacanos before he fell. Together, these jumbled up victims of your ancestor yield one two jawbones and two conch shells that you can take.
W5. After making your way through a long and seemingly endless corridor, you arrive at another stone platform perched at the edge of a vast cistern filled with water. It looks like you will have to find the ropes that hold the doors below closed and cut them in half in order to drain the water once more. That is, unless you have learned to swim since the last cistern was emptied?
W8. You approach a left-hand turn in the tunnel and find that your way forward is blocked by two roughly hewn stone altars, each with a greenstone figurine placed on top. One looks like a T-Shaped Headdress Priest, while the other—with its ribcage exposed—is clearly an Open-Chest Warrior. Clearly you will have to interact with one or both of these statues in some manner in order to go any further. You can’t help but notice that the T-Shaped Headdress Priest figurine is much smaller and cracked than the Open-Chest Warrior figurine—whether this means anything or not is anyone’s guess. If you choose to pick up the T-Shaped Headdress Priest figurine, turn to U1. If you choose to pick up the Open-Chest Warrior figurine, turn to U2.
X1. You fix the last of the greenstone tablets into the remaining hollow depression in the wall and wait for something to happen. Unfortunately, that something is the wooden grill beneath your feet opening up and disappearing, plunging you into a head-over-heels fall fifty feet into the abyss. Your fall is cushioned by a leathery pillow of some sort. As your eyes adjust to the daylight far above from where you fell, you realize that you are lying on the oversize scaled body of a monstrous boa constrictor of some sort. As you grope around for your weapon, you feel a sharp pain in your neck and collapse in a heap back into the serpent’s scales. The world grows dark and it is only a matter of moments before you are swallowed whole.
Incorrect first glyph arrangement at Gate of the Glyphs. Wooden grill beneath player opens up and player falls 50 feet onto soft body of enormous anaconda. Player is killed within moments.
X3. Hanging from the ceiling is a comically large stalactite that oozes mineral-rich goo. You may lick all the goo off of this stalactite to RESTORE ALL YOUR LOST VITALITY. You must, however, wait 10 turns before you can use it again.
X4. Propped up in a circular pot filled with ashes is a Bird-Head Staff similar to that which you saw on the cave wall painting of the shaman and enraged bison several levels below. If you choose to take it, QUETZALCOATL’S STAFFwill allow you to cast a single guaranteed COWARD’S BANE SPELL without having to use any items or win a Rock, Paper, Scissors test.
X5. High up on the bumpy surface of the rock wall, framed by stone bricks, is a crude image of a horned beast you have never seen before.

X7. Gushing blood from its many wounds, the Feathered Serpent attempts to rise up into the air above you one last time, showering you in a hail of red. As it does so, you cast the INFERNO SPELL and its entire body alights in flames, bringing it crashing back down to Quetzalcoatl’s Roost in a crumpled heap of feather, scales, and broken claws. With tears streaming down your cheeks, you stare in disbelief as the Feathered Serpent’s funeral pyre burns ever higher, its trail of smoke reaching high into the sky. You hear a commotion behind you and turn to look at the city. The previously disorganized crowd of curious and hopeful onlookers has now become an enraged mob. Shrill cries of “burn it all down!” reach your eyes and you watch in horror as fires spring up all throughout the city like exploding fireflies. It suddenly dawns on you that you have inspired an uprising: the legendary city of stone and gods will burn tonight, of that you have no doubt. But you have no interest in joining the conflagration of your people’s tormentors. Your ordeal is over and Teotihuacan is a nightmare you wish to wake from. As the sun sets and the city is consumed by towering infernos, you steal stealthily into the night and run in the opposite direction of those who wish to burn the city down, inadvertently bumping shoulders with as you flee. There is no point trying to make your way back to your village, for there only the ruins of a past life remain. Instead, you head toward the coast, where you hope to start a new life, free from tyranny and oppression and sadistic overlords. Then one day, while tending to the meager crops grown on your tiny plot of land on a barren hill overlooking the ocean, you see an unexpected sight: four large double-hulled catamarans, filled with strange-looking men and a few women. When you approach them and try to communicate, it becomes clear that they once had many more people in their party, but that many had perished over the course of some long journey. Though you do not share a language, you understand that you are welcome to join them. You offer them what little food you have: an armful of sweet potatoes, which seems to excite their interest. On the day of your departure, it finally occurs to you to ask them what they call these magnificent boats. One man puffs his chest with pride and says: Vaka moana. What a beautiful name, you say to yourself.
X9. You peer around the corner of the tunnel and prepare to squint your eyes to see what lies beyond, but instead your eyes grow larger. Lit torches are ensconced along the wall all the way down to the end of the corridor and there is nothing to inhibit your view. And it is a strange view indeed. A man, most likely a shaman of some sort, wears a bird-head mask and holds a bird-head staff. Standing next to him is a massive hoofed beast with a magnificent coat of fur. It is the wall image comes to life, minus the rhinoceros and its six dots. The shaman holds your eyes with an icy stare, then walks over to the midsection of the hoofed beast. Muttering something under his breath, the shaman takes his bird-head staff and plunges it into the underbelly of the beast, which lets out a vicious roar.
You see its intestines spill out on to the ground, spattering blood and guts on the ground and walls nearby as its writhes in misery. The shaman then whispers softly in its ear, which seems to direct its attention—and rage—to you. The beast scrapes its back hoofs against the ground, lowers its head for a charge, and then bursts forth in your direction. You must fight ENRAGED BISON (25 VITALITY, 8 AGILITY, 2d6+3 DAMAGE). If you are victorious, turn to I2.
Y1. Painted onto the highest of the cave wall looking down on you is the following scene, in which the beast on top has been drawn in such a way as to wrap around both sides of a natural contour of the wall corner:

Y3. In a remote but brightly lit chamber covered by a wide grill some fifty feet above your head, you find a ceramic disk of the Storm God wedged into the side of the stone-faced wall.
This is a particularly menacing depiction, complete with blood dripping from his headdress. If you wish, you may dislodge this STORM GOD DISC from its slot in the wall and see what effect (if any) if may have down the road.
Y4. As you approach the terminus of the corridor, you can see—long before you reach the dead end—that the brick wall has completely collapsed into a pile of rubble. In its place is a gaping black hole in the middle of the wall that appears to slide steeply down into a dark abyss. Reaching your torch as far as you can extend your arms through the hole, you can see the dim outline of a smooth rock slope that resembles a stone waterfall. It appears to be about a ten-foot drop to the ground below. Though it won’t be hard to lower yourself down on the rock slide, climbing back up is out of the question. This is a one-way tunnel to below. If you decide to lower yourself down through the tunnel, turn to L9. If not, you may turn around and continue your exploration of the Sun Pyramid.
Y6. Just around a narrow bend in the towering corridor a grisly sight awaits you: a lean old man, clad in only a loincloth , whipping himself with a leather strap while muttering incoherent nonsense and staring straight up at he sky. Bloody streak marks line every inch of his body, and there is already a sizeable pool of blood around his feet. Though he is not physically imposing, it is clear that he can take a pounding. As you approach with caution, the incoherent muttering transforms into a deliberate chanting of some sort of mantra and rises in pitch and urgency. You must fight SELF-FLAGELLATING PRIEST (VITALITY 60). Every three rounds combat, the Self-Flagellating Priest will cast the SPECTRAL SHRIEK SPELL (4d6 DAMAGE) on you. The only way to mitigate the damage from this spell is to cast a COWARD’S BANE SPELL in defense. If successful, you will only take 2d6 damage. During the intervening two rounds of combat, he merely absorbs your attack blows and continues chanting his mantra. If you win, turn to U4.
Y7. Fastened to a massive stone pillar with a chiseled out ring on its surface is the thickest rope you have ever laid eyes on. This will require a truly intense slice of your blade to sever. To do so, you must perform the BERSERKER kendamamaneuver (#15) with no less than two additional cup captures after the initial maneuver. After 10 unsuccessful tries, you must fight a BLOWGUN WARRIOR (35 VITALITY, 9 AGILITY, 2d6+4 DAMAGE) who hears the pitiful sounds of your frustrated cries and comes to investigate. If this is the second rope for this cistern that you have managed to cut, turn to O5. Otherwise, you must find and cut the other one.
Y8. Around a bend in the corridor you come face to face with a wall filled from top to bottom with the etchings of stylized human heads. Each one is carved out in bas-relief upon the stone bricks and is elevated slightly from the face of the wall. Upon closer examination, you think you recognize at least one—perhaps more?—as not just similar but identical to the wall symbols you’ve seen before. They appear to be buttons that you can push. Since every single one of the symbols is a head of some sort, this must be a puzzle in which you have to identify the match of ones that you have already encountered throughout this pyramid. Consulting only your notes and memory and without flipping through any STORYLINE entries, you must determine how many of the glyphs you’ve seen are representations of a humanoid head. You will preface this number with the letter that appears earliest in the alphabet of the identifying grid labels that mark the locations of these glyphs. When you think you have the answer (i.e., one letter followed by one number), turn to that entry in the STORYLINE. The correct entry will make immediate narrative sense, while incorrect entries will not make narrative sense.
Y9. On the ground in front of you are two jumbled up human skeletons, the flesh long ago picked clean by the wild animals that roam through these chambers. Probably they were former sacrificial victims who were also fed to Huehueteotl like you. A sour smile forms on your lips as you take some satisfaction in having survived longer than they did. You may remove two JAWBONES from these skeletons if you wish.
Z1. You find the following carefully carved greenstone block inside a ceremonial tripod that was knocked over by the dead trainer’s body:

Z2. It gives you no pleasure or satisfaction to land the final death blow on this tormented woman and watch her limp body fall to the ground with a sickening thud. As you turn over her bloodied corpse, however, you discover a silver lining to this grim affair—her necklace and a cloth pouch tied to her waistband. Add one JAWBONE and one CONCH SHELLto your Character Sheet. Inside the cloth pouch are the ground-up leaves of the psychoactive AYAHUASCA PLANT(restores 2d6 VITALITY when used), which you may also take.
Z3. You run in haste with a final mad dash to the base of the pyramid where the High Priest is carrying out his blood-soaked sacrificial ritual to Quetzalcoatl. Dark grey clouds are now moving in toward Quetzalcoatl’s Roost at the top of the pyramid and a distant rumbling of thunder can be heard. The sacrifice is almost complete! You must kill the HIGH PRIEST (40 VITALITY) in THREE ROUNDS OR LESS to ensure that the ritual is interrupted and Quetzalcoatl is not called into this world in all his terrible splendor. If, however, you defeat the High Priest in four rounds or more, the ritual reaches its intended conclusion and the High Priest has successfully called Quetzalcoatl into this world without diminishment. During this battle, the JUGULAR kendama maneuver (#14) will not result in an instant kill, but rather inflict 4d6 damage on the High Priest due to all the precious stone accoutrements adorning his body. If you win, regardless of how many rounds it took, you may now turn to H5 on the map for Level 6: Quetzalcoatl’s Roost.
Z4. Against the outer stone wall of an inner chamber, you see the dim light of a torch and its bearer: another escapee, by appearance a man. He is well built and in seemingly good health. Just as you are considering whether or not to approach him, he lifts his torch in your direction to get a better look at you. “Hey there! Don’t worry, I won’t hurt you.” You stay put, raising your obsidian dagger in his direction as he approaches. “Okay, okay,” he says, raising his hands. “I’ll drop it.” He kneels down and places his dagger on the ground. “We don’t need to be friends. I’ve seen what we can do to each other. I just want to ask you if you’ve seen those strange signs on the wall over there.” “Over where?” you ask with a steely lack of emotion, not lowering your dagger in the least. “Right over there, where the two walls meet in the center of the pyramid. All I want to say is that they look a lot like symbols I saw when I was held captive in the Plaza of the Glyphs while waiting for my sacrifice. The High Priest seems to regard them as sacred and they might be worth noting if you want to live. That’s all I’ll say.” Seeing no change in your stance or demeanor, he then picks up his dagger and backs away into the darkness. Perhaps he’s trying to be genuinely helpful, or perhaps he’s planning to ambush you the moment you turn your back in the direction indicated. Who can know for sure?
Z6. Weary as can be, you stagger to the end of the corridor and are dismayed to find a dead end. Upon closer examination, however, you find that a large round stone sculpture is embedded within the center of the wall. In the light of your torch, you gasp as you realize it is a much larger version of the Medallion of Mictlantecuhtli:

If you have the Medallion of Mictlantecuhtli, turn to F6. If not, this dead end shows no signs of becoming anything else, so you’d better go find it!
Z7. You find the following carefully carved greenstone block inside a ceremonial tripod:

Z8. As you near Quetzalcoatl’s Roost, bent over on your knees in exhaustion at your endless roundabout ascent, you spare another glance for the dramatic scene unfolding below you. Not only is the main processional avenue of the city teeming with people, but many have now begun to leap over the balustrades of the Courtyard of the Feathered Serpent, braving rattlesnake bites in their effort to get closer to the most incredible occurrence of their lives: the conjuration of Quetzalcoatl, the might Feathered Serpent himself, in the flesh! Suddenly the full enormity of the situation washes over you, nearly bringing you to despair. As an unnaturally large shadow drapes over you, you turn your head slowly around and look up toward the Roost, fearing what is there. Blotting out the setting sun is a monstrous green serpent covered in colorful feathers, with claws as long as your arm. And then you feel no more. Fate and courage has brought you to this point. It is your destiny, you feel, to put an end to the tyranny of the Teotihuacanos. The people are cheering you from down below and hailing you as a hero. The time has come to give them something to cheer about!
Z9. Just a stone’s throw away from the sloping tunnel that brought you to this cave, you find the path forward blocked by a series of upturned tree roots and tangled branches that look like they were deposited here at the end of a destructive wave of some sort. Though none of the roots or branches are particularly thick, they seem to have some sort of hardened coating on them, probably as result of the intense heat of a volcanic eruption. You cannot clear a path through them merely by sawing away patiently with your obsidian dagger. You will have to pull off a much more forceful concentration of energy via the “Discombobulate” kendama maneuver (#11). Relax: there are no enemies here and you have all the time in the world to cut your way through. However, you may not pass through the black grid square to the right of Z9 until you have completed at least two successful “Discombobulate” maneuvers—and considering the disconcerting paintings on the wall behind you, you should probably try to become more proficient at such maneuvers before venturing any further into this cave.